AWS
Overview
ShiftControl supports both user sync and Single Sign-On (SSO) for AWS. It also supports group sync, allowing you to control the membership and sync of groups in ShiftControl which can then be used in AWS to assign them to roles.
Supported Licenses
Amazon Web Services supports Single Sign-On (SSO) for all licenses and accounts!
What you need to know
Add a AWS Identity Center and Configure SSO
Follow these instructions in order to add AWS to ShiftControl and configure Single Sign-on (SSO).
Configure Single-Sign On
Log in to your AWS Root account as admin
Log in to Amazon Web Services with an account that has Administrator Access or your root account. If your organization has multiple accounts, log in to the main account, not a sub-account.
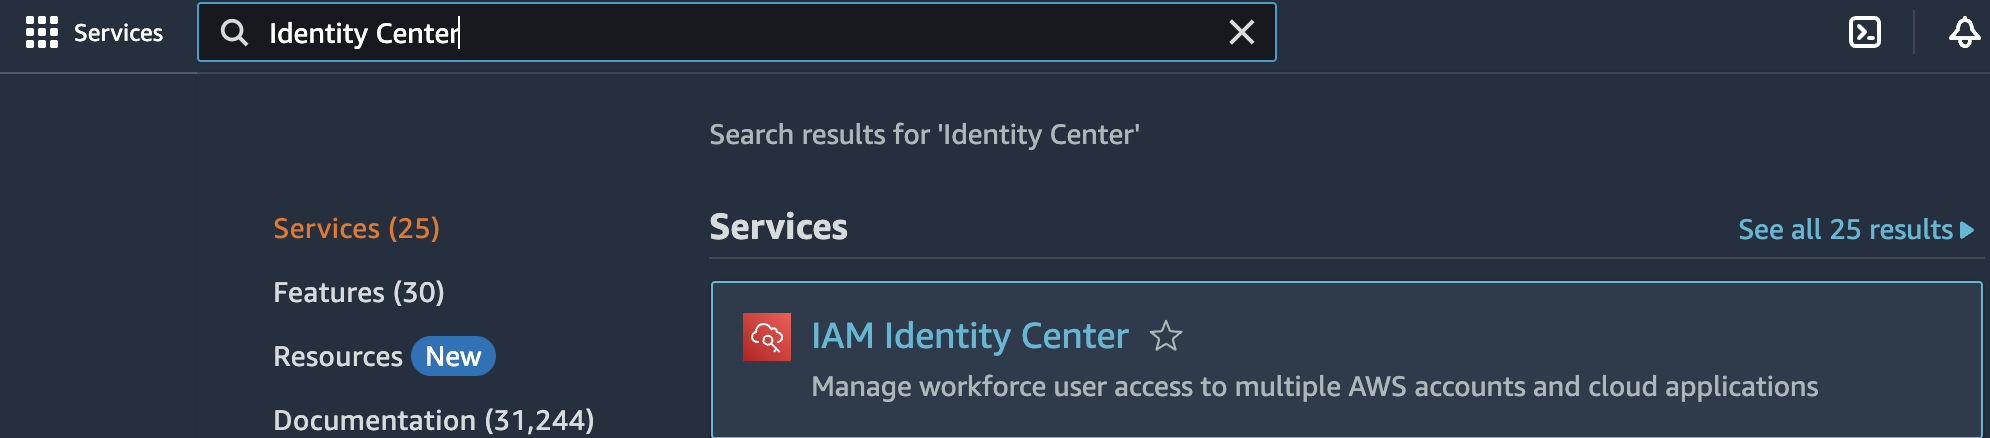
Go to Identity Center
In your Amazon Console, search for “Identity Center” and click on IAM Identity Center.
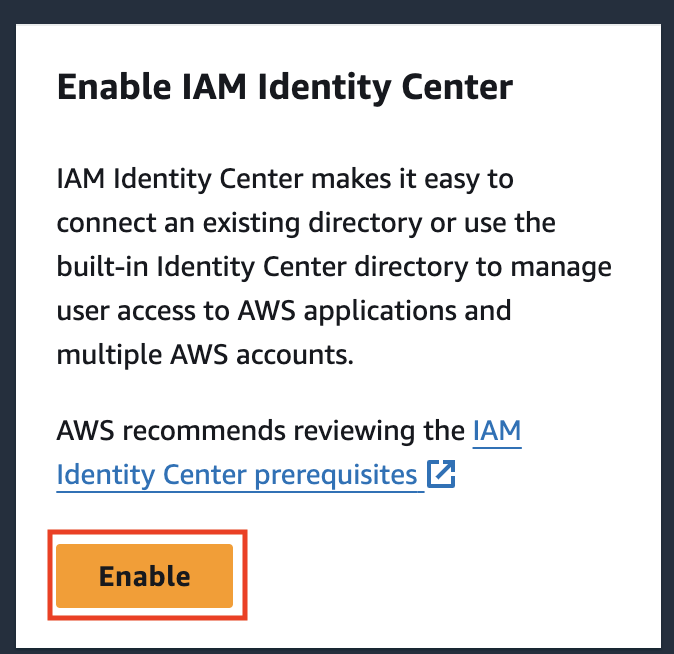
Enable Identity Center in your preferred region
Choose your region, and then click Enable in the Enable IAM Identity Center panel. Please see this doc for help choosing your region: https://docs.aws.amazon.com/singlesignon/latest/userguide/get-started-prereqs-considerations.html?icmpid=docs_sso_console
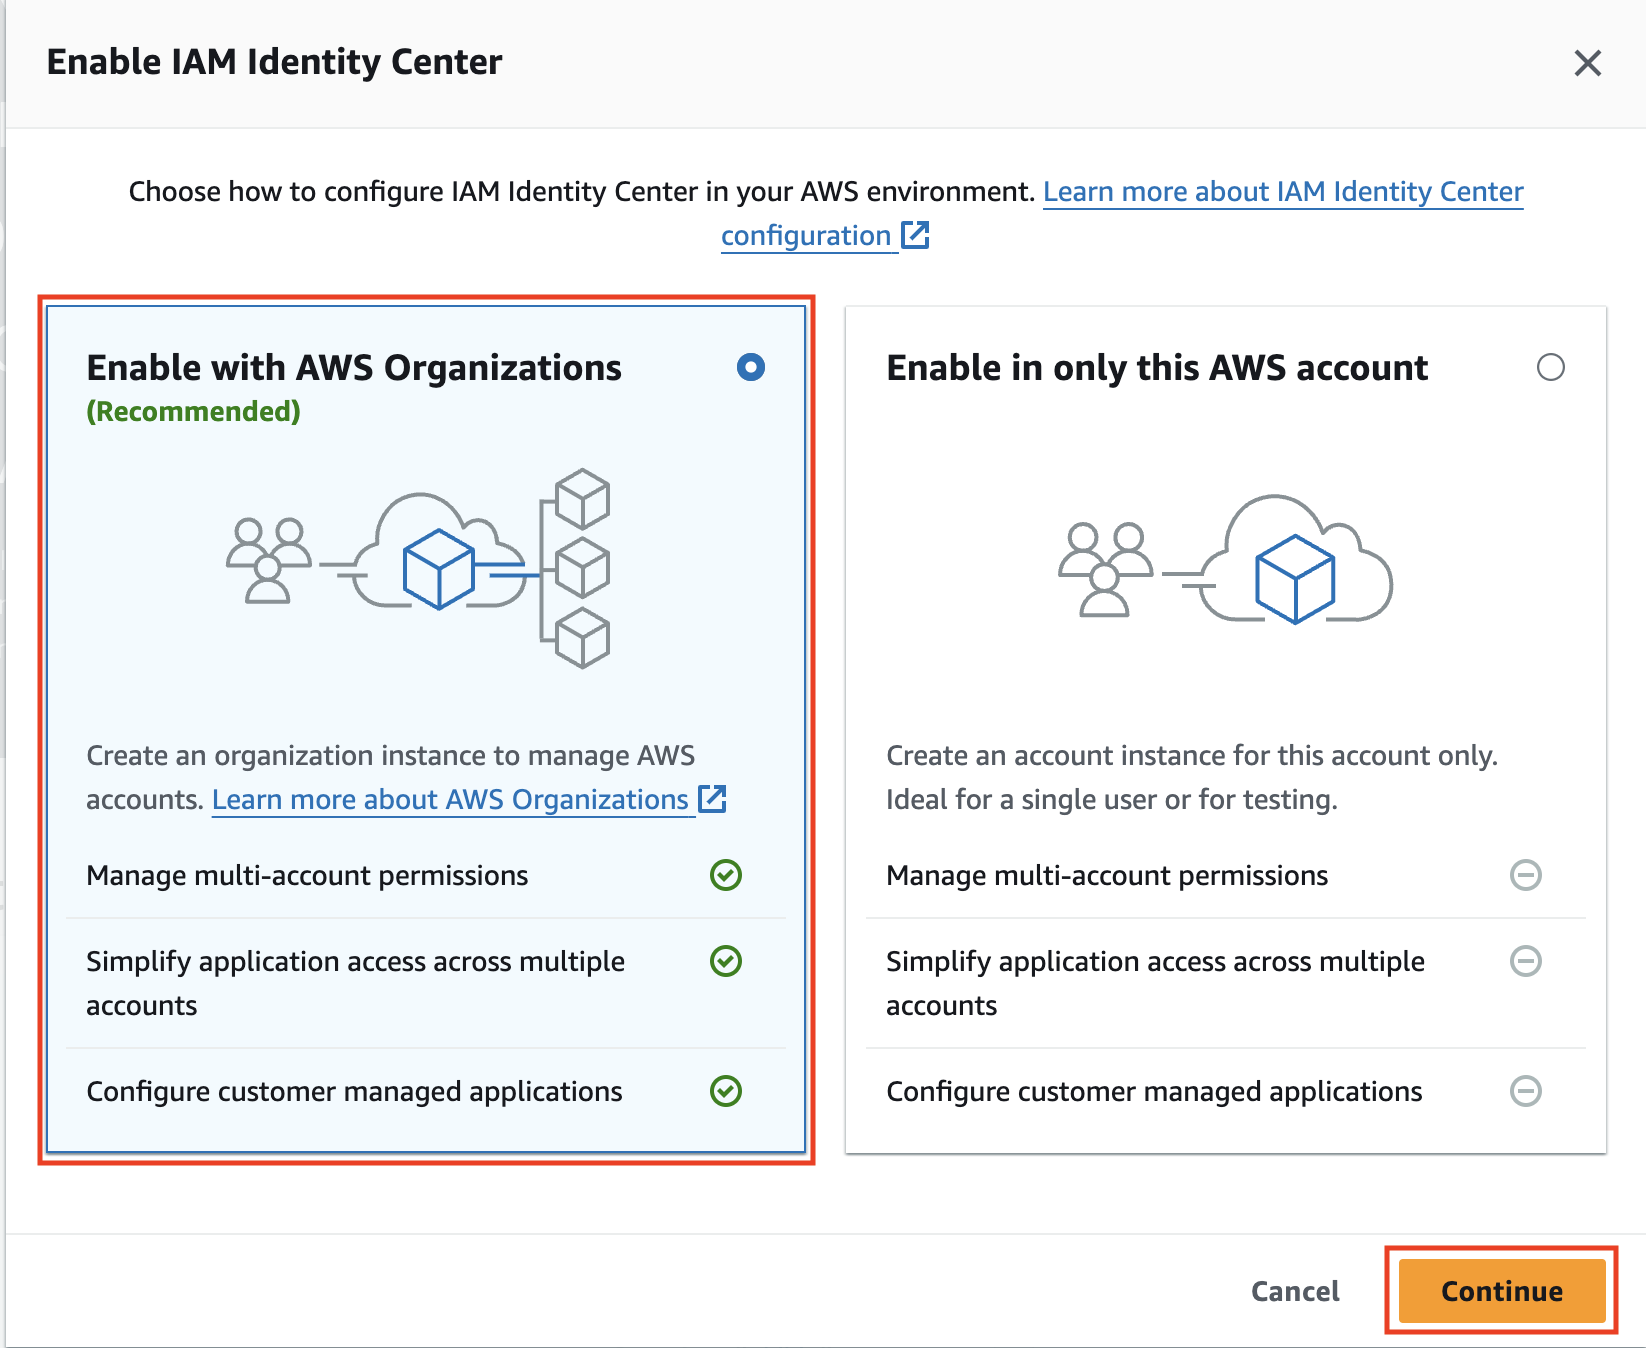
Enable Identity Center with AWS Organization
Choose Enable with AWS Organization and continue.
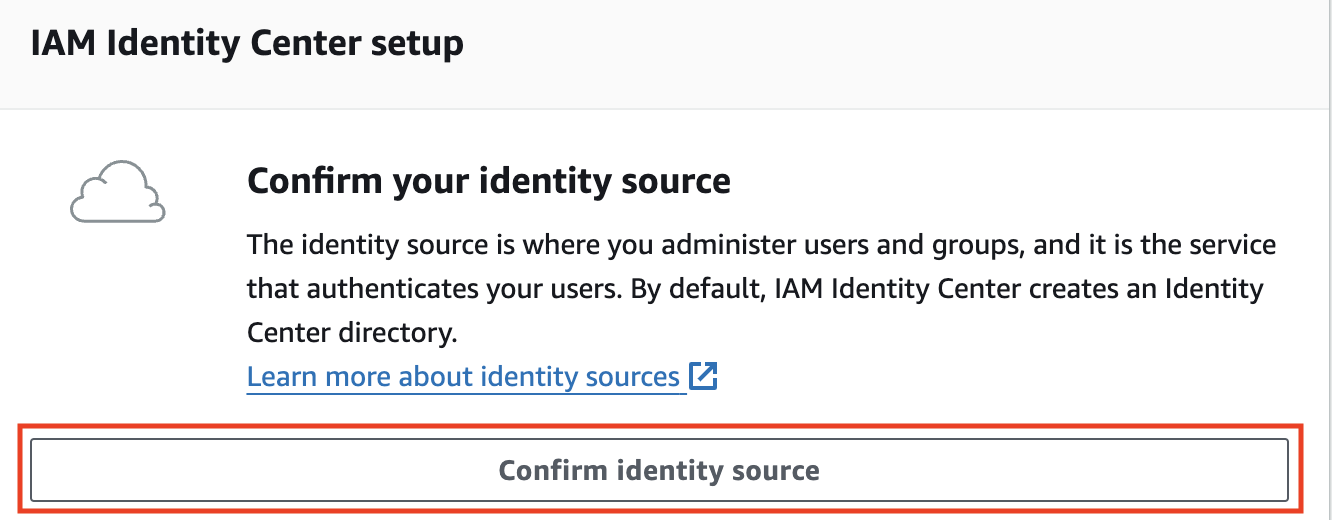
Confirm the Identity Source
Click on Confirm Identity Source in IAM Identity Center Setup area.
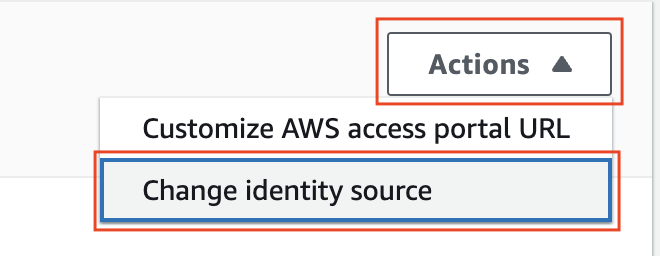
Change Identity Source
Click on the Actions drop down and choose Change identity source.
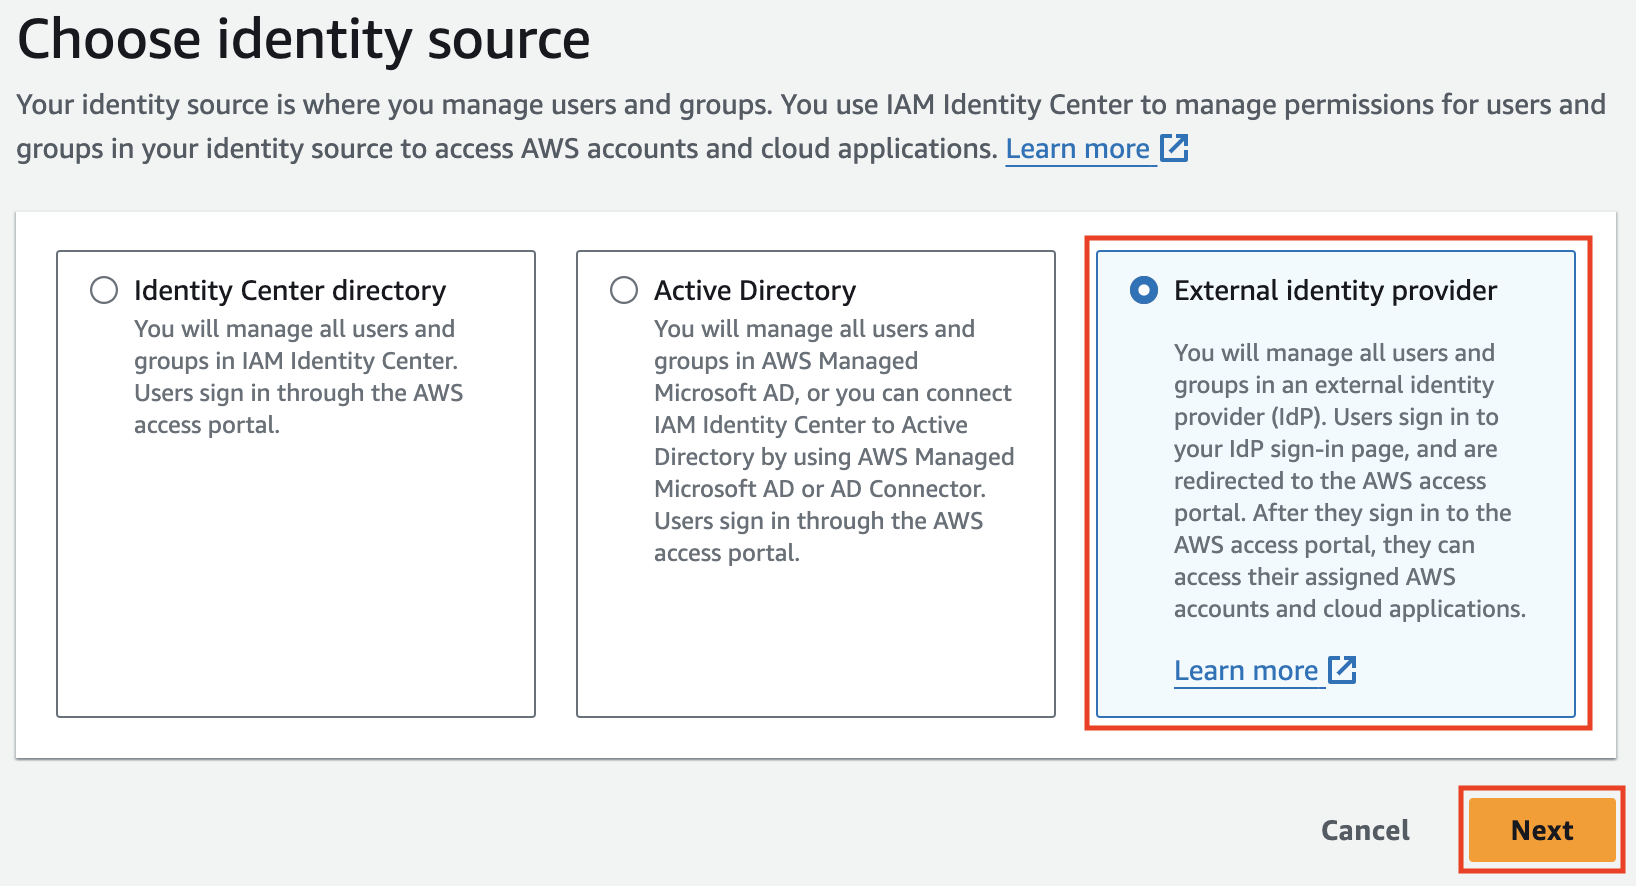
Choose External Identity Provider
Choose External identity provider and click next.
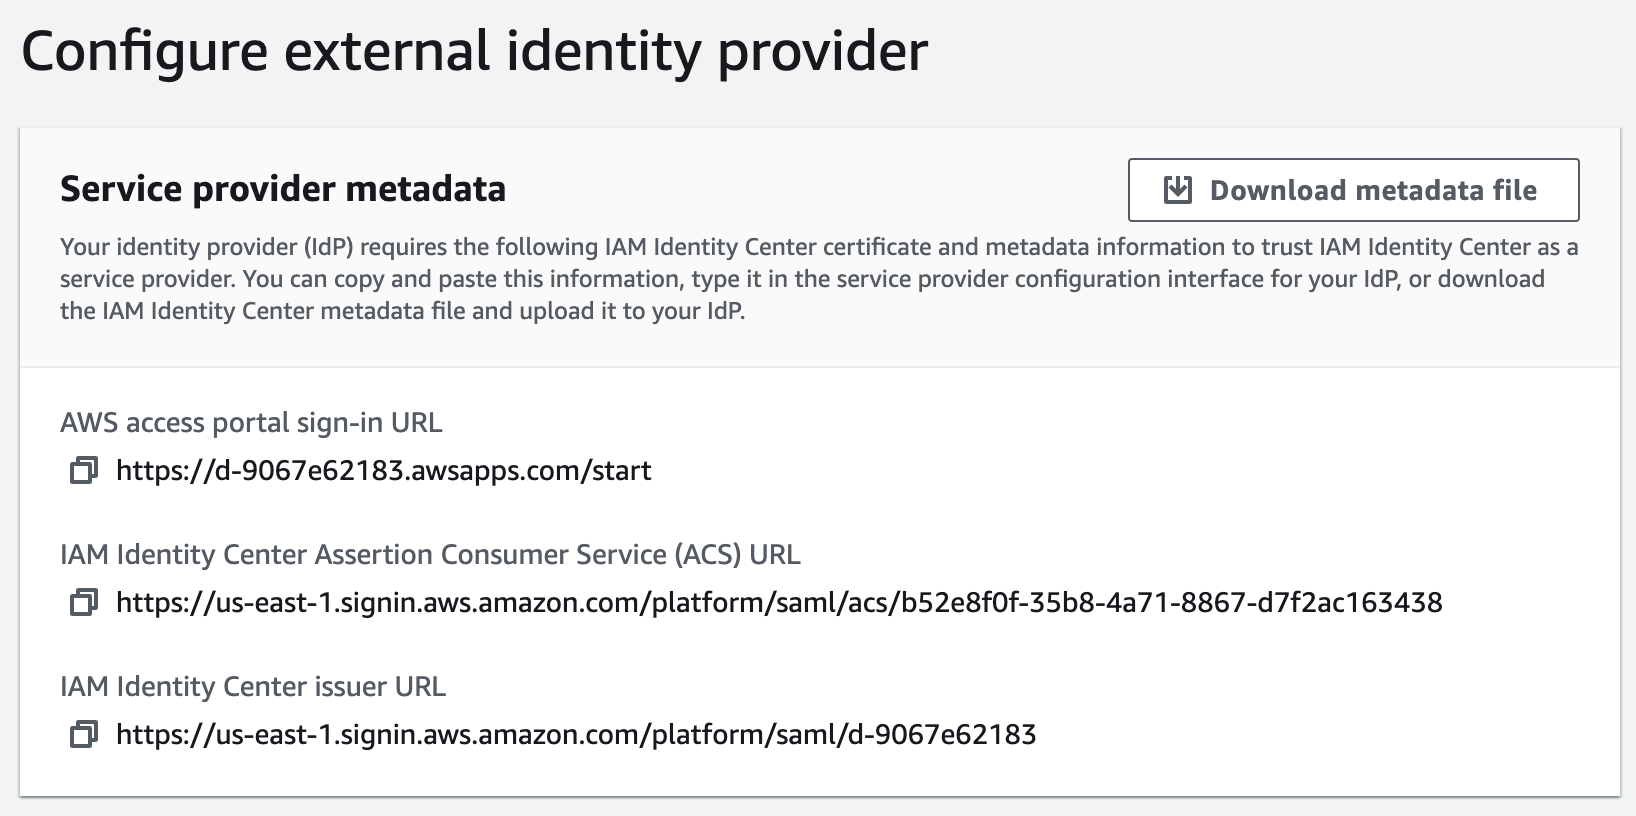
Choose External Identity Provider
You’ll see a set of configuration items you’ll need to enter on the ShiftControl portal, we’ll create the app in ShiftControl next.
Log in to ShiftControl & go to Apps
Log into ShiftControl and go to the Apps area.
Add a new app in ShiftControl
In the apps area, click Add new app.
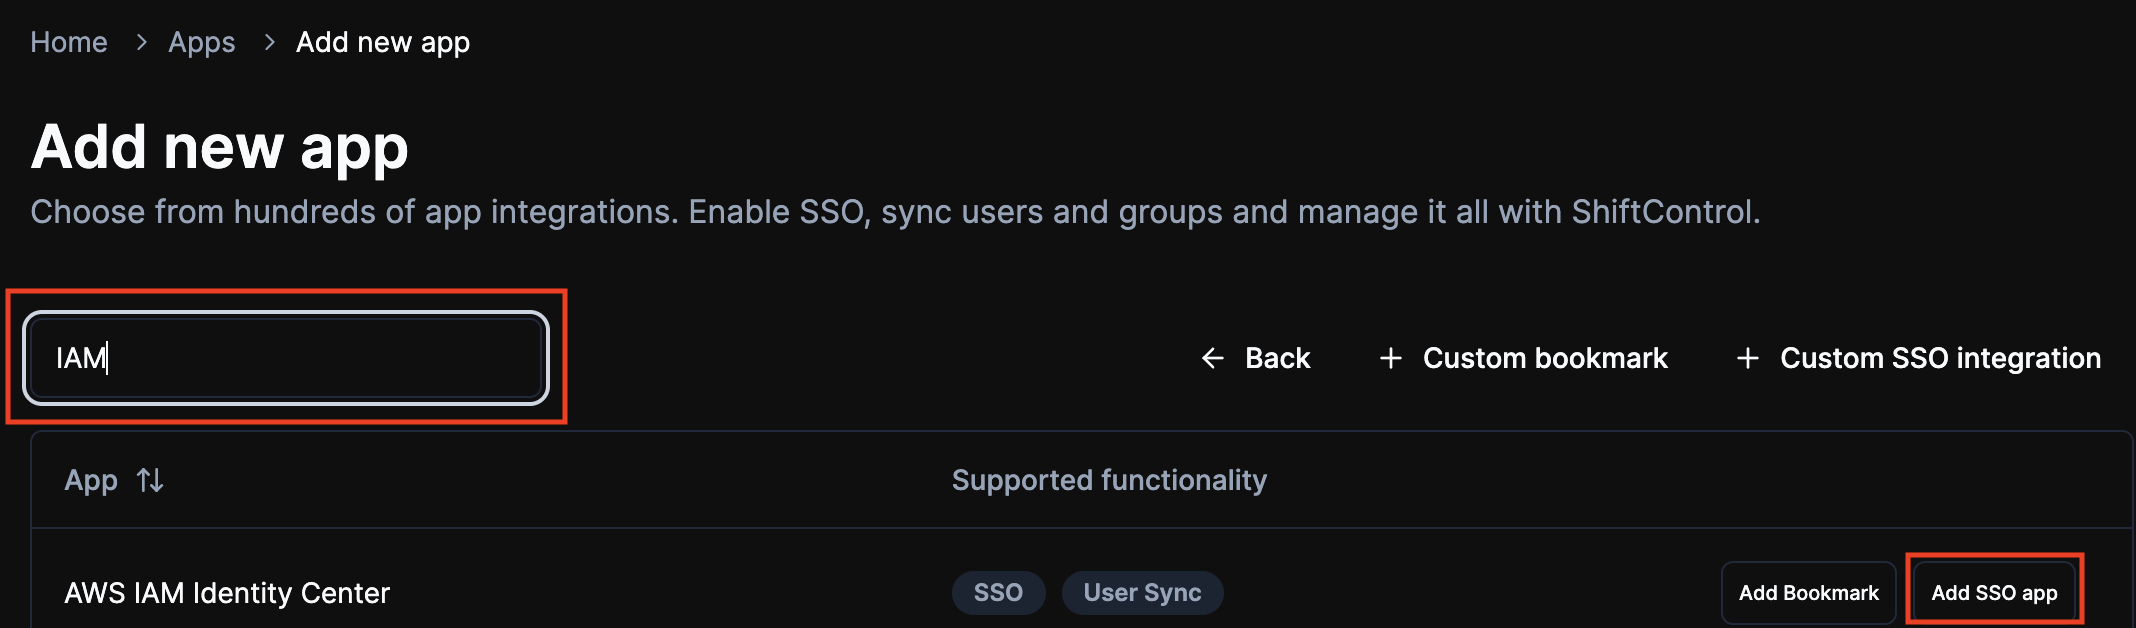
Add the AWS IAM Identity Center App
Search for “IAM” and click on Add SSO App for “AWS IAM Identity Center”.
Rename and Save the app
Rename the app if you’d like (We recommend calling it AWS), and add a description and click Save. This will generate all the configurations needed for the next steps.
Edit the app
Click on edit for the AWS App you just created and then click on the SSO tab.
Configure SSO on ShiftControl
We’ll now take the configuration items from AWS and copy them to ShiftControl.
- Copy the AWS access port sign-in URL, and paste it into the Login Url field in ShiftControl.
- Copy the IAM Identity Center Assertion Consumer Service (ACS) URL, and paste it into the ACS Url field in ShiftControl.
- Copy the IAM Identity Center Issuer URL, and paste it into the SP Entity ID field in ShiftControl
- Your ShiftControl SSO configuration should look similar to this:

Configure SSO on AWS
Next, we’ll take some configuration items from ShiftControl and copy them to AWS.
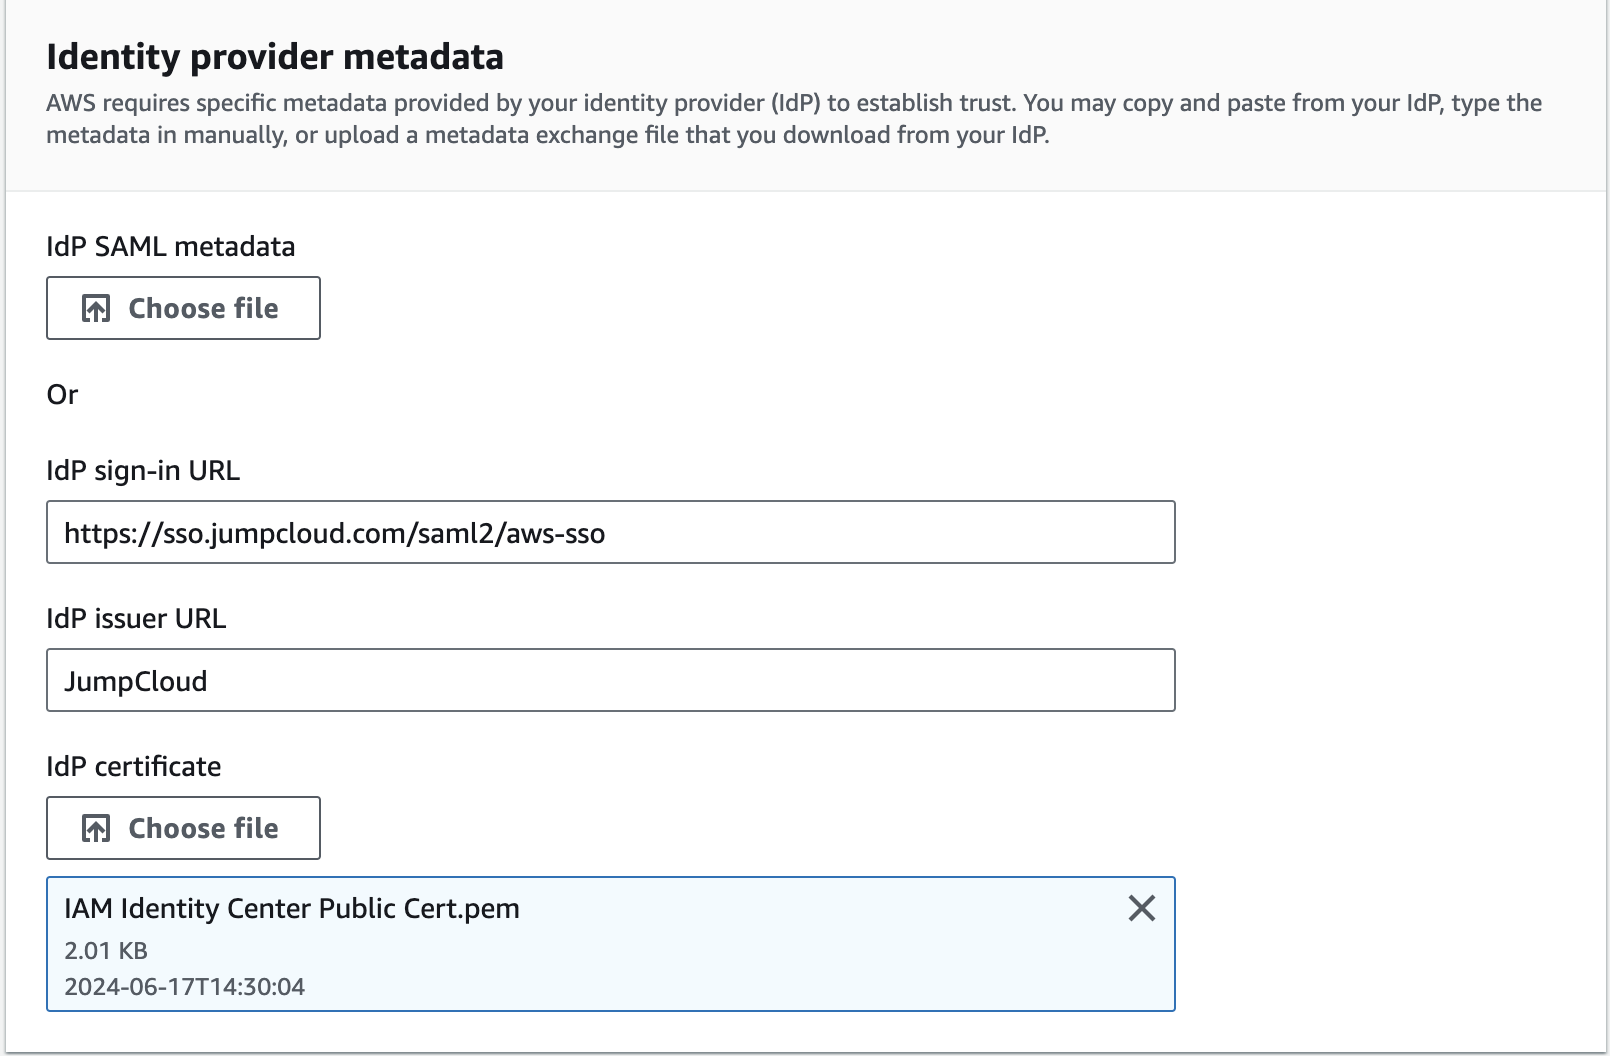
- Copy the Login url from ShiftControl and paste it into the IdP sign-in URL field on AWS.
- Copy the IdP Entity ID from ShiftControl and paste it into the IdP issuer URL field on AWS (The field says URL, but it isn’t always a Url 😊)
- Click on Download IdP Public Certificate in ShiftControl, and then upload it by clicking the Choose File for the IdP certificate field in AWS.
- Your AWS configuration should look similar to this:
- Click Next on the AWS screen.
Save the app on ShiftControl
You can now click Save in the ShiftControl configuration screen for the app.
Accept the notice
Review the accept screen for AWS so you understand the impact, type ACCEPT and hit the Change Identity Source button.

You've now configured SSO for AWS!
Configure User Sync (Automatic Provisioning)
Automatic provisioning allows users to be provisioned and removed from AWS based on the group membership/app assignment in ShiftControl.
😠 JumpCloud APIs do not yet allow us to fully configure user provisioning, you’ll need to do this step in the JumpCloud platform. We’re actively working with JumpCloud to allow this kind of configuration via APIs.
Enable automatic provisioning
In the settings for the identity provider in AWS click on the enable button in the Automatic provisioning callout box.

View your configuration items
You’ll see two configuration items that you need for the JumpCloud side:
- SCIM Endpoint
- Access Token (Click on the Show Token Button)
Log in to JumpCloud's admin portal
Make sure you log in to the JumpCloud Admin portal at https://console.jumpcloud.com/login/admin with your admin account.
Access the AWS Application
Go to SSO Applications on the left hand side and then choose the AWS Identity Center app (Or AWS, depending on what you named it)
Access Identity Management
Click on the Identity Management tab and click on the Configure button next to Configuration Settings.
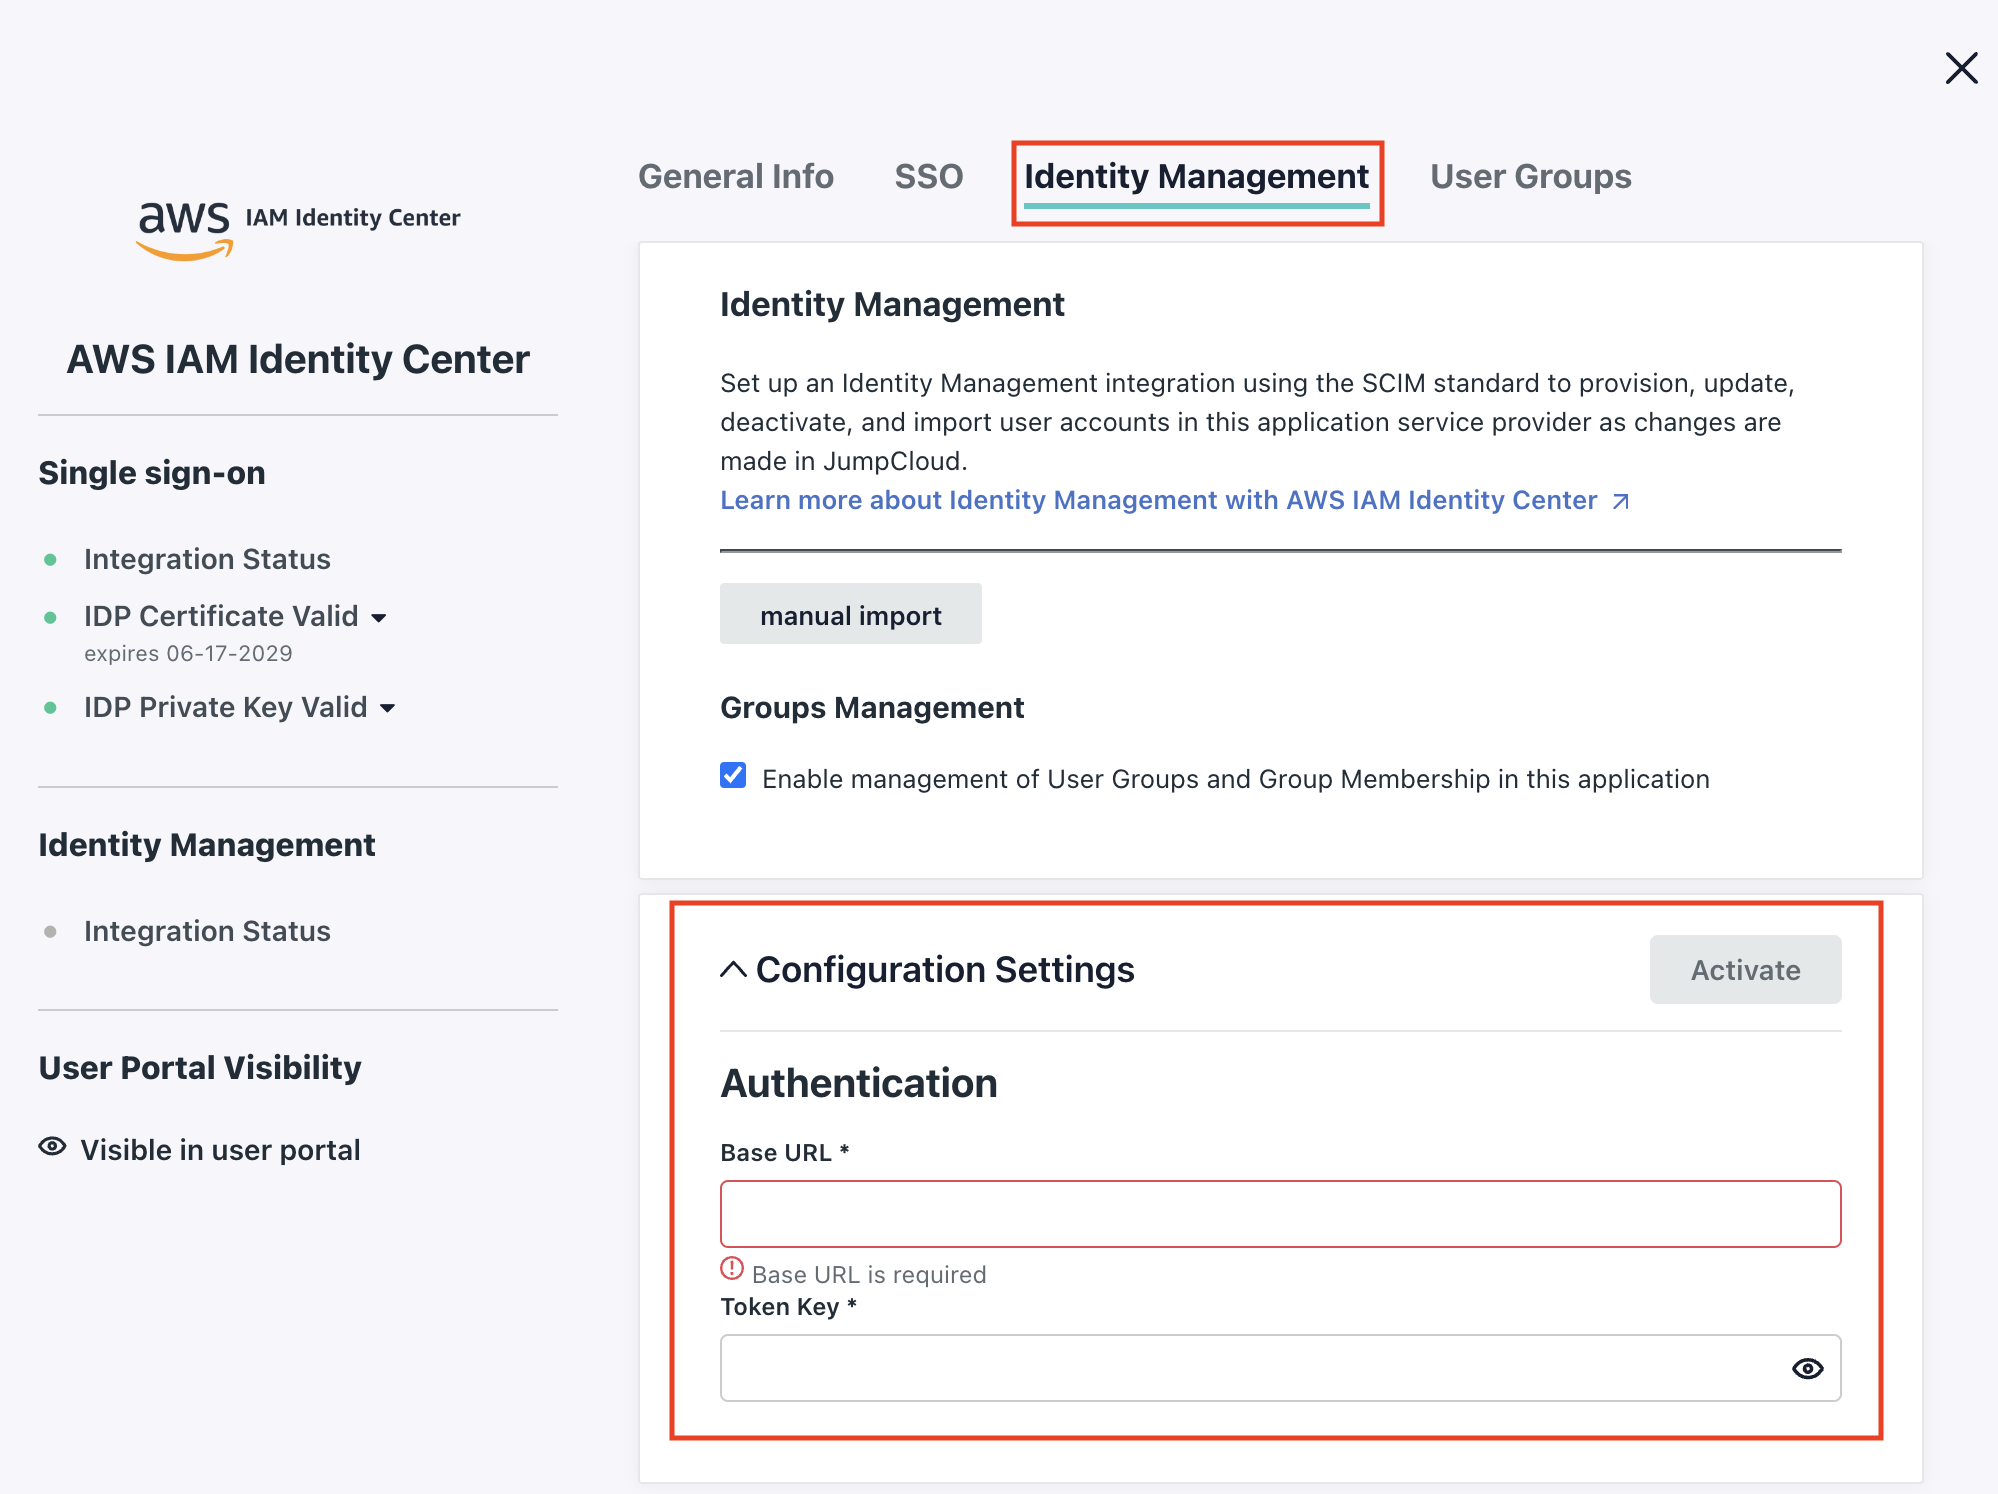
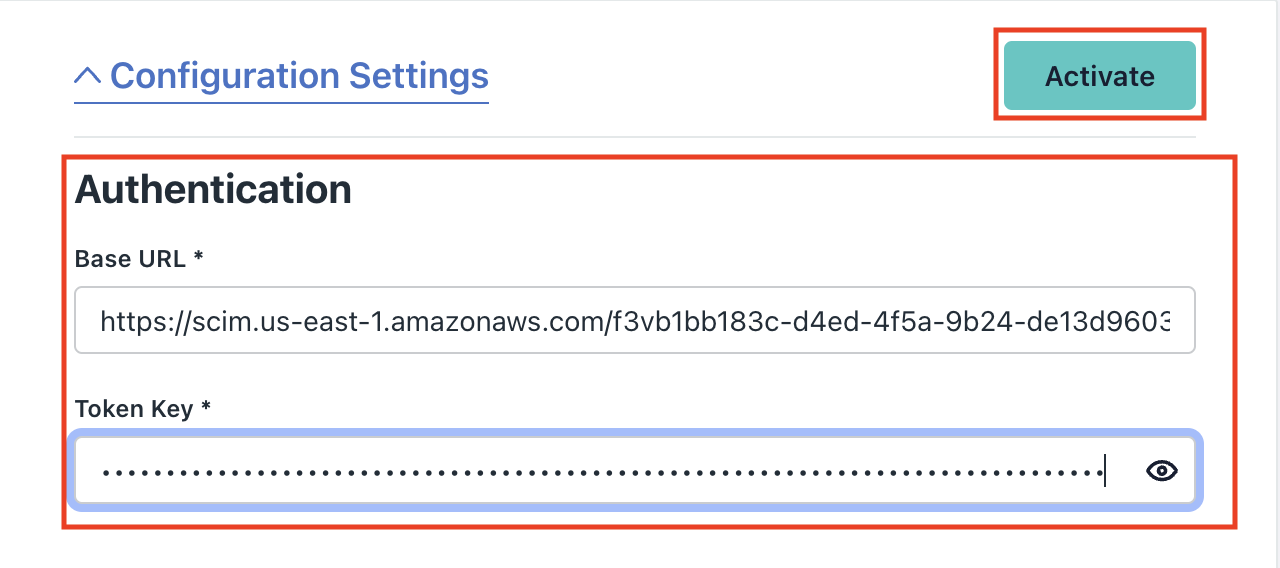
Configure the SCIM Endpoint
Copy the SCIM Endpoint from AWS and paste it in the Base Url field in JumpCloud.
Configure the Access Token
Copy the Access Token from AWS and paste it into the Token Key in JumpCloud.
Activate identity management
Click Activate
Save the changes
Click Save in the JumpCloud app.
Close the pop-up on AWS
You can also close the pop-up on the AWS screen.
Verify User Sync is enabled
Refresh the Apps screen in ShiftControl, you’ll now see User Sync enabled for the app.

User Sync is now enabled for AWS!
Pushing Groups and Users to AWS
Any group that is assigned to the app in ShiftControl will be pushed down to AWS where it can then be used to assign permissions & roles.
For example, let’s say you wanted to have a group called All Software Developers pushed to AWS.
Create a group
Create the group and modify the membership in ShiftControl.
Assign the group to the app
Go to the app and assign the group to the app and click Save.
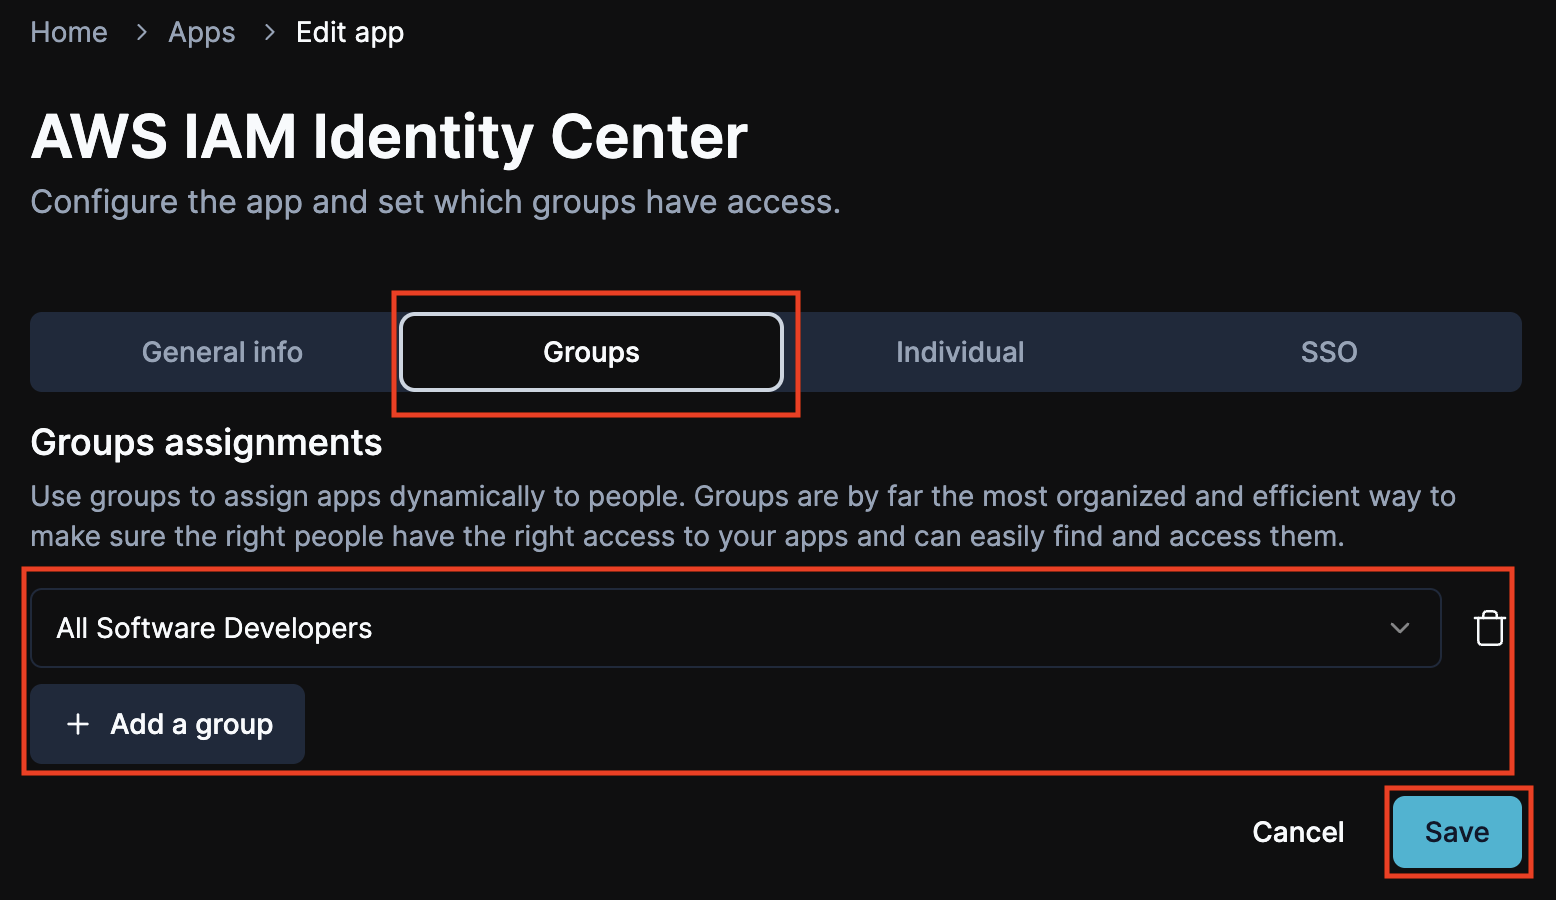
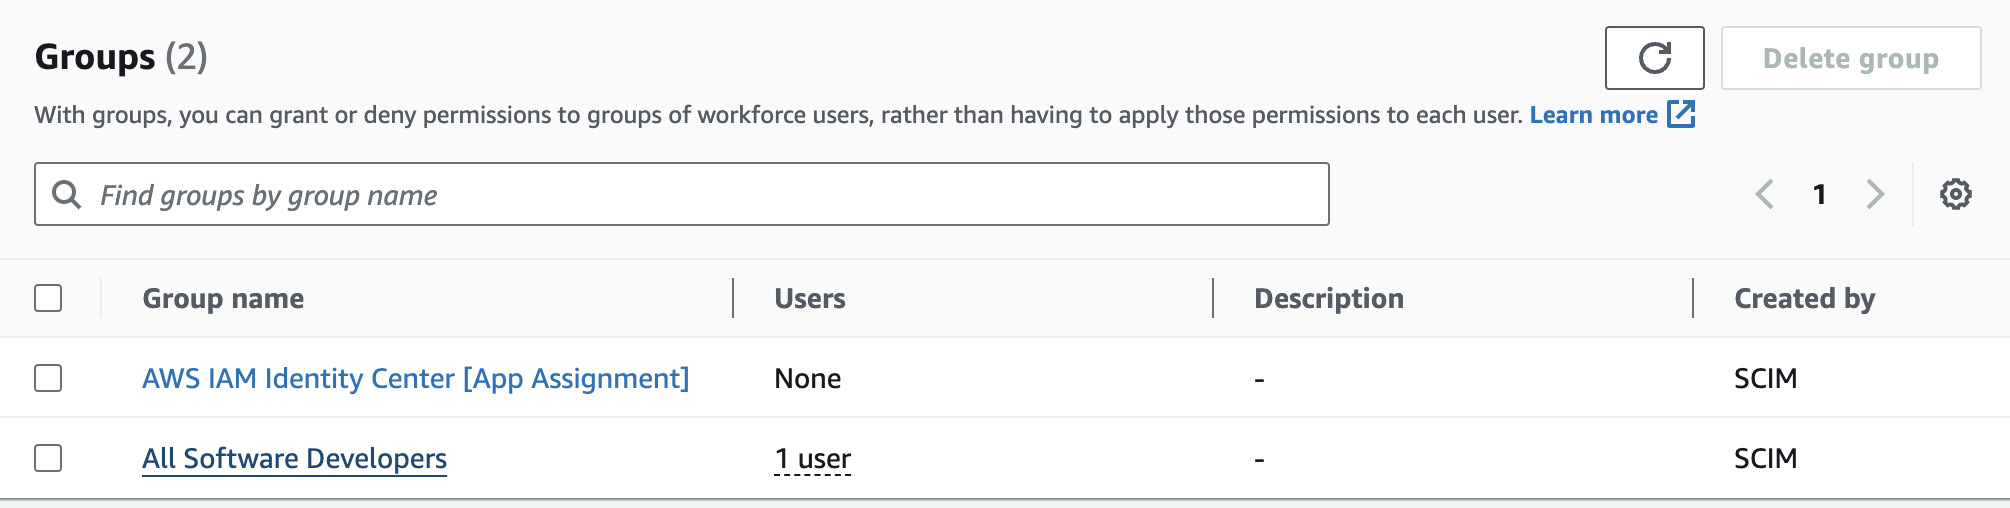
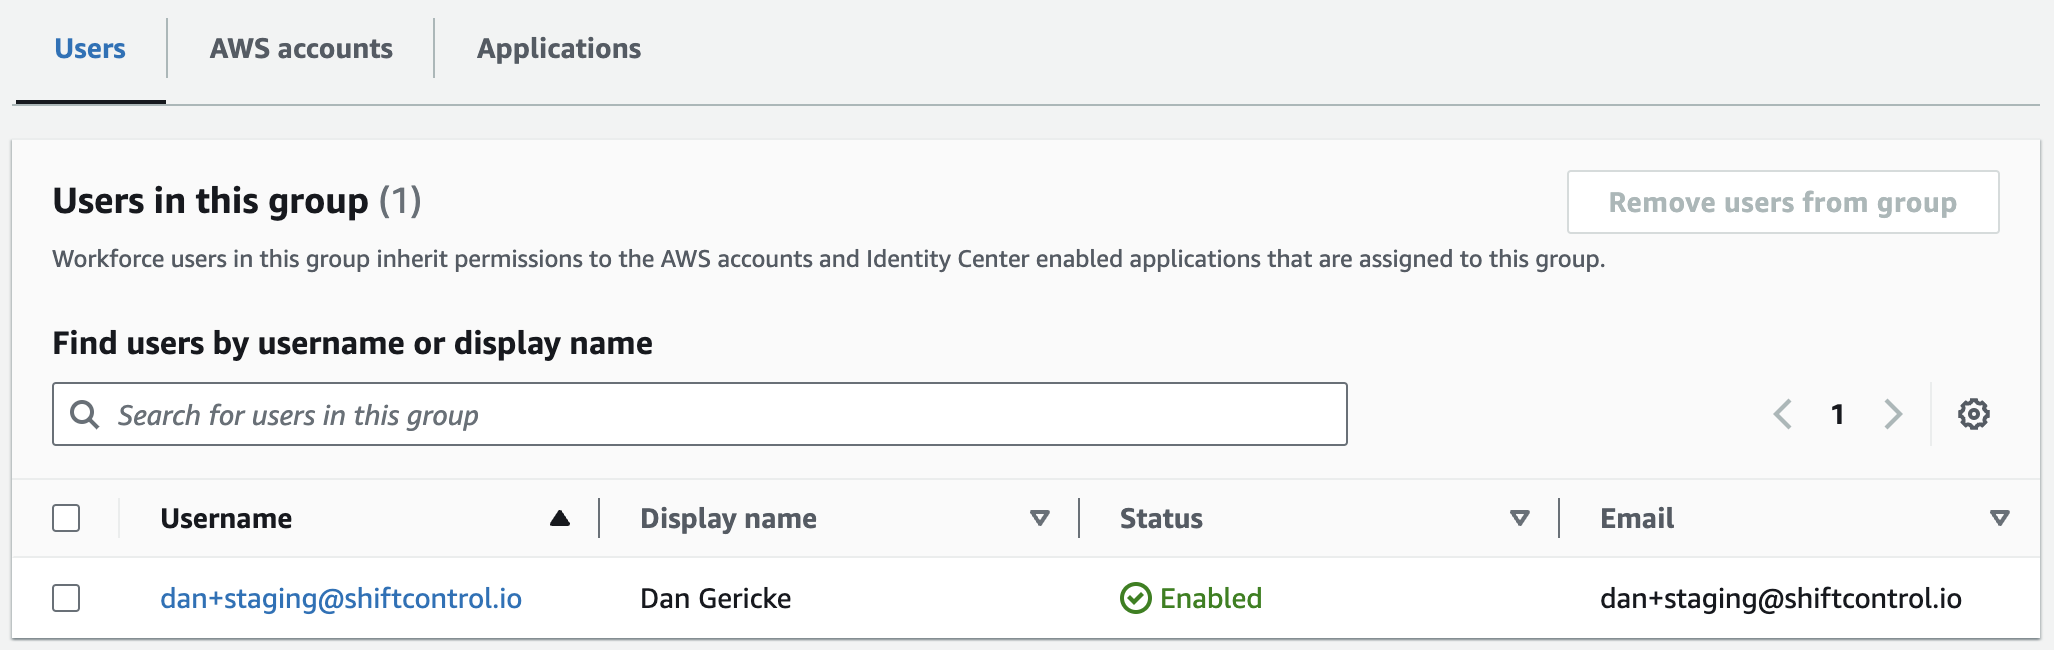
Check that the group was synced in AWS
Now you’ll see that group and anyone assigned to that group in AWS.
Enable automatic provisioning
Once you have created your permission sets, you can assign those to groups and accounts.
We leave the rest of the AWS configuration to the developers, as each organization is different!