Configure Google Workspace as an Identity Provider
Overview
JumpCloud supports Federated Authentication, allowing your team to sign in with an external Identity Provider (IdP) instead of JumpCloud’s native login. This guide explains how to set up Google Workspace as an external IdP so your users can log in with their Google accounts while you continue managing devices and access policies in JumpCloud.
This setup is only required if you decide to host your own OIDC app for JumpCloud authentication. ShiftControl will handle this configuration for you using our own client and project in JumpCloud as part of the onboarding process.
Federated login changes the flow for all users in the routing policy you apply. Test with a pilot group before rolling it out company-wide.
Prerequisites
- Google super-admin rights and billing enabled in Google Cloud Console
- JumpCloud Admin role
- Ability to create projects and OAuth clients
Access Google Cloud Console
Go to Google Cloud
Go to cloud.google.com.
Open the Console
Click on Console at the top right corner of the page.
Log In
Log in with your Google account.
Create a Dedicated Project
Go to the Project Picker
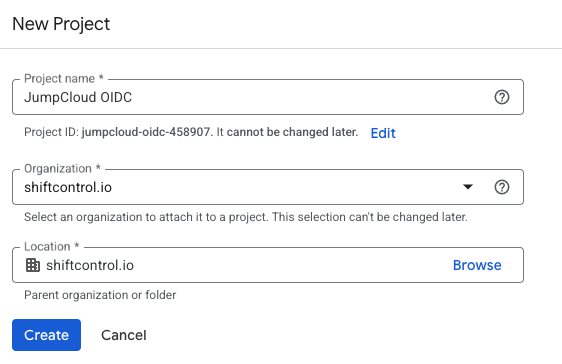
Once logged in, go to the project picker and select New Project.

Name and Create the Project
Name the project something obvious like JumpCloud OIDC and click Create.
Configure the Auth Platform
Select OAuth Consent Screen
From the left navigation menu, select APIs & Services → OAuth consent screen.
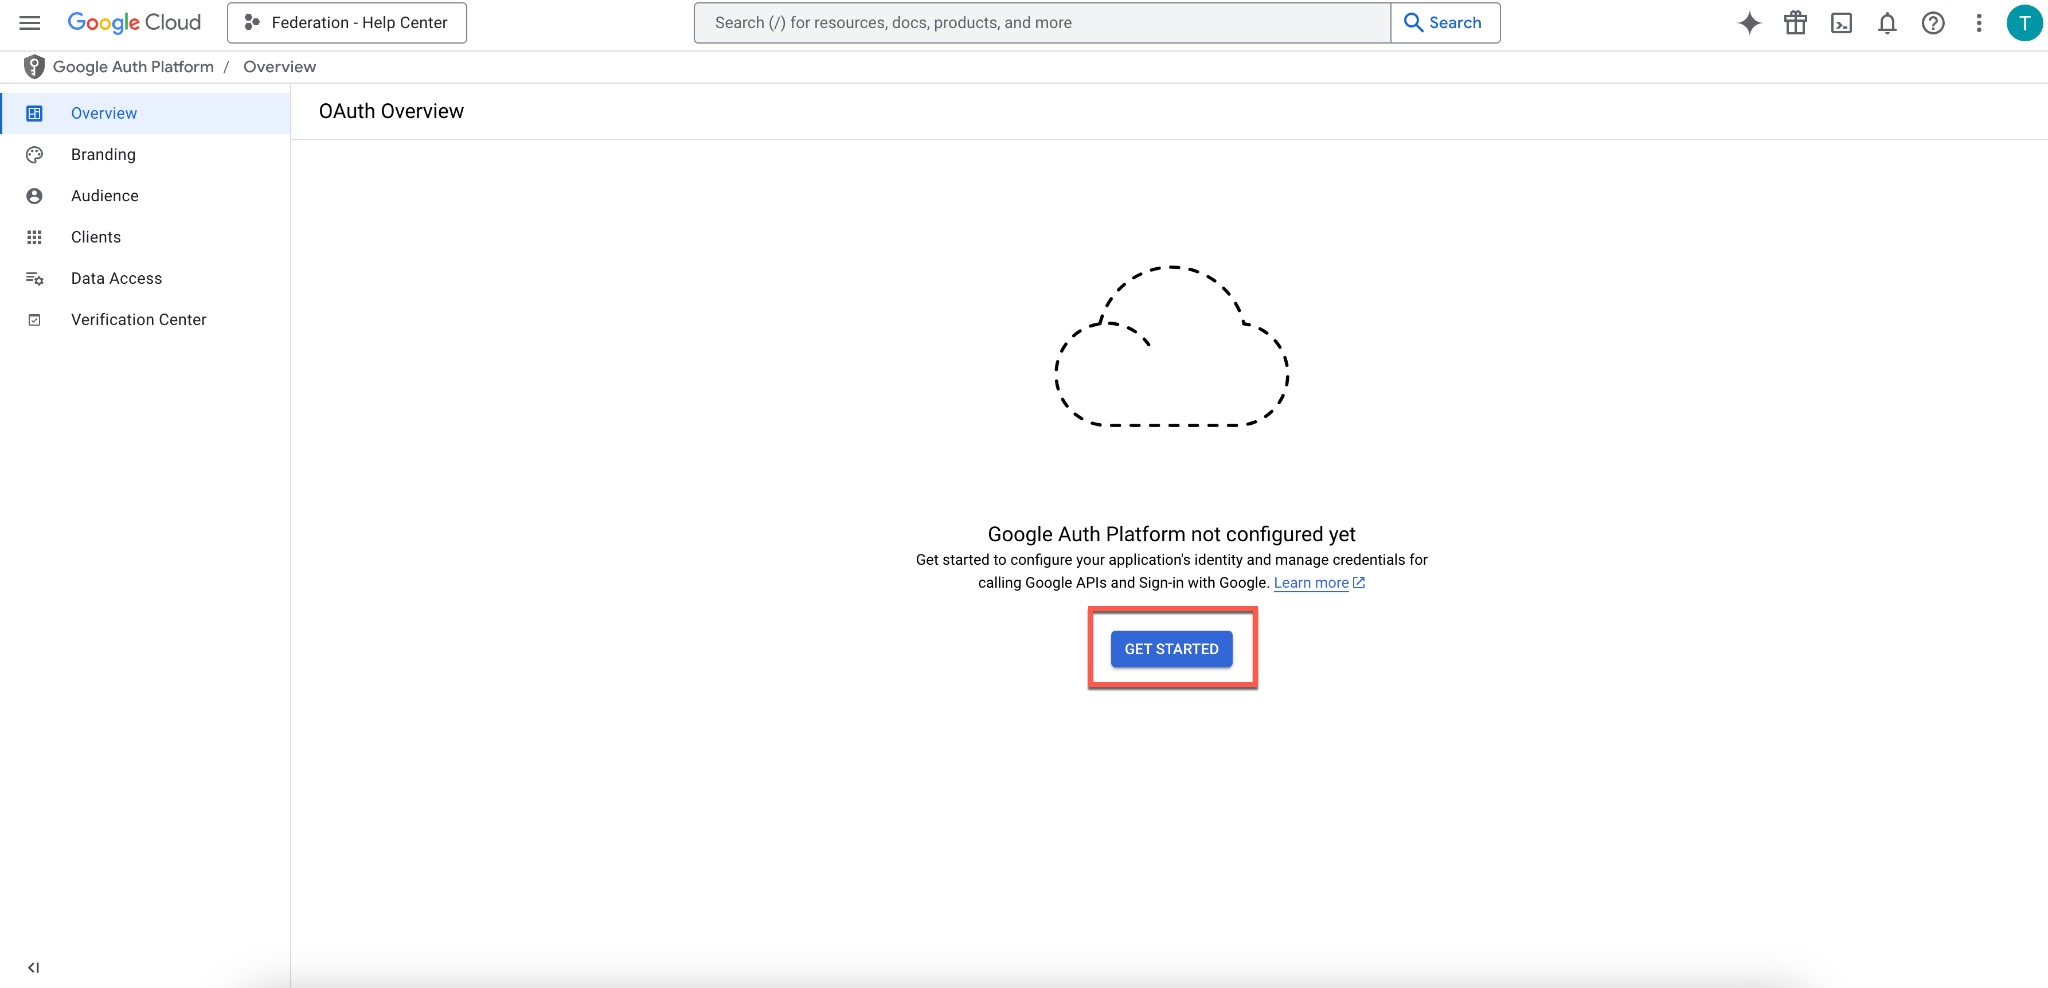
Click Get Started
Click on Get Started.
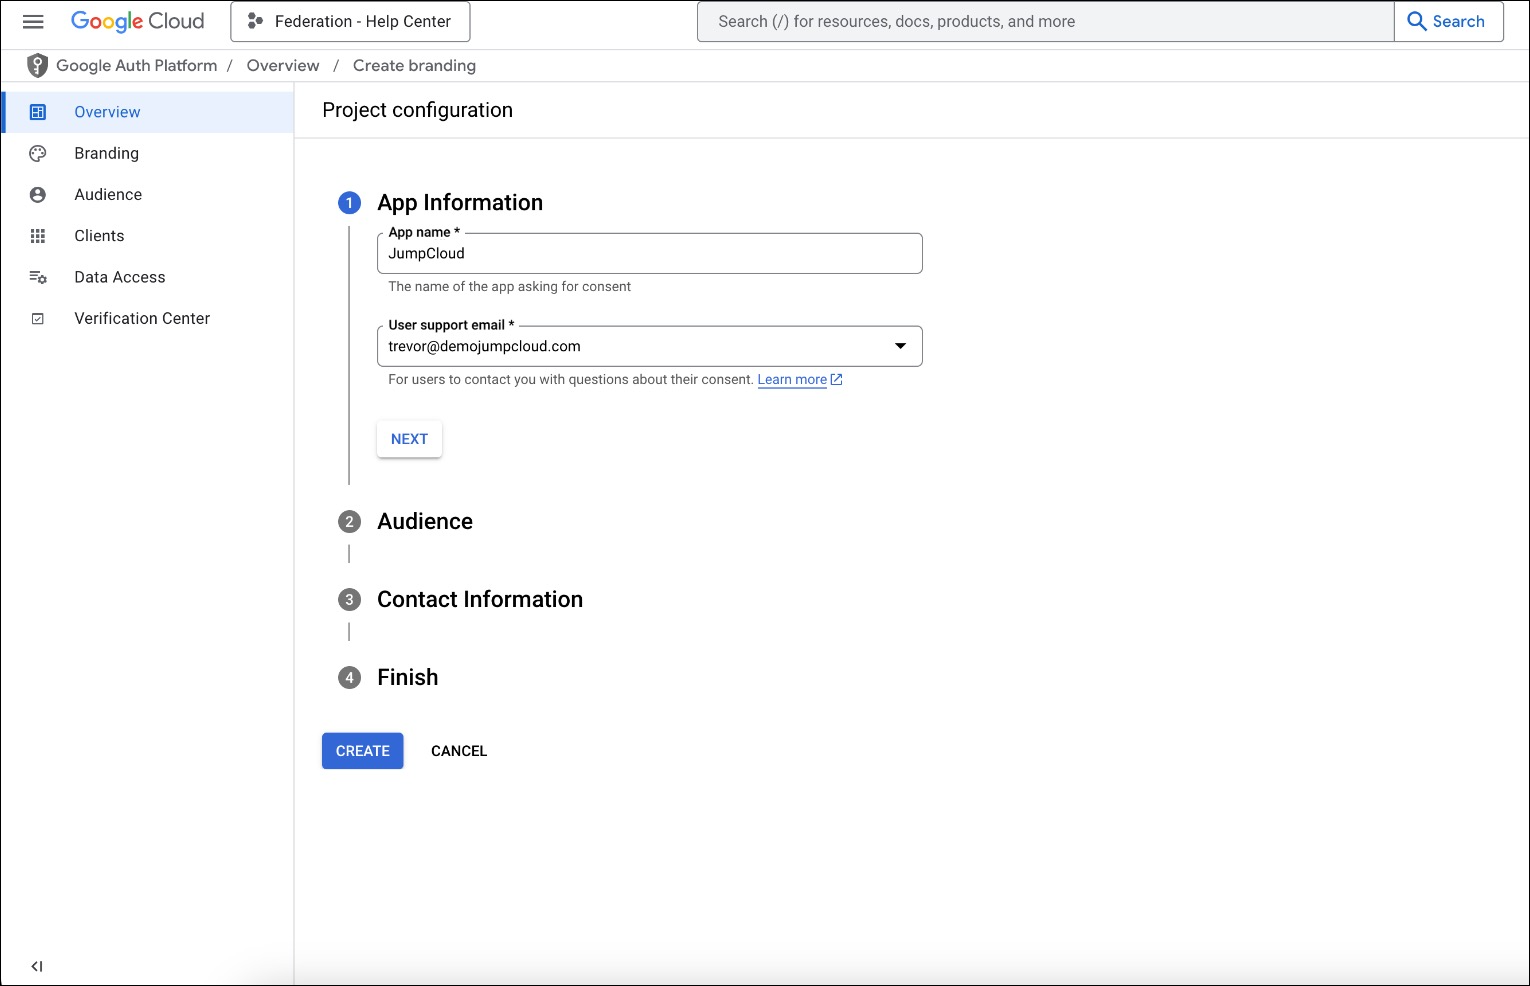
Fill App Information
Fill in App name (e.g., JumpCloud OIDC) and the User support email. Click Next.
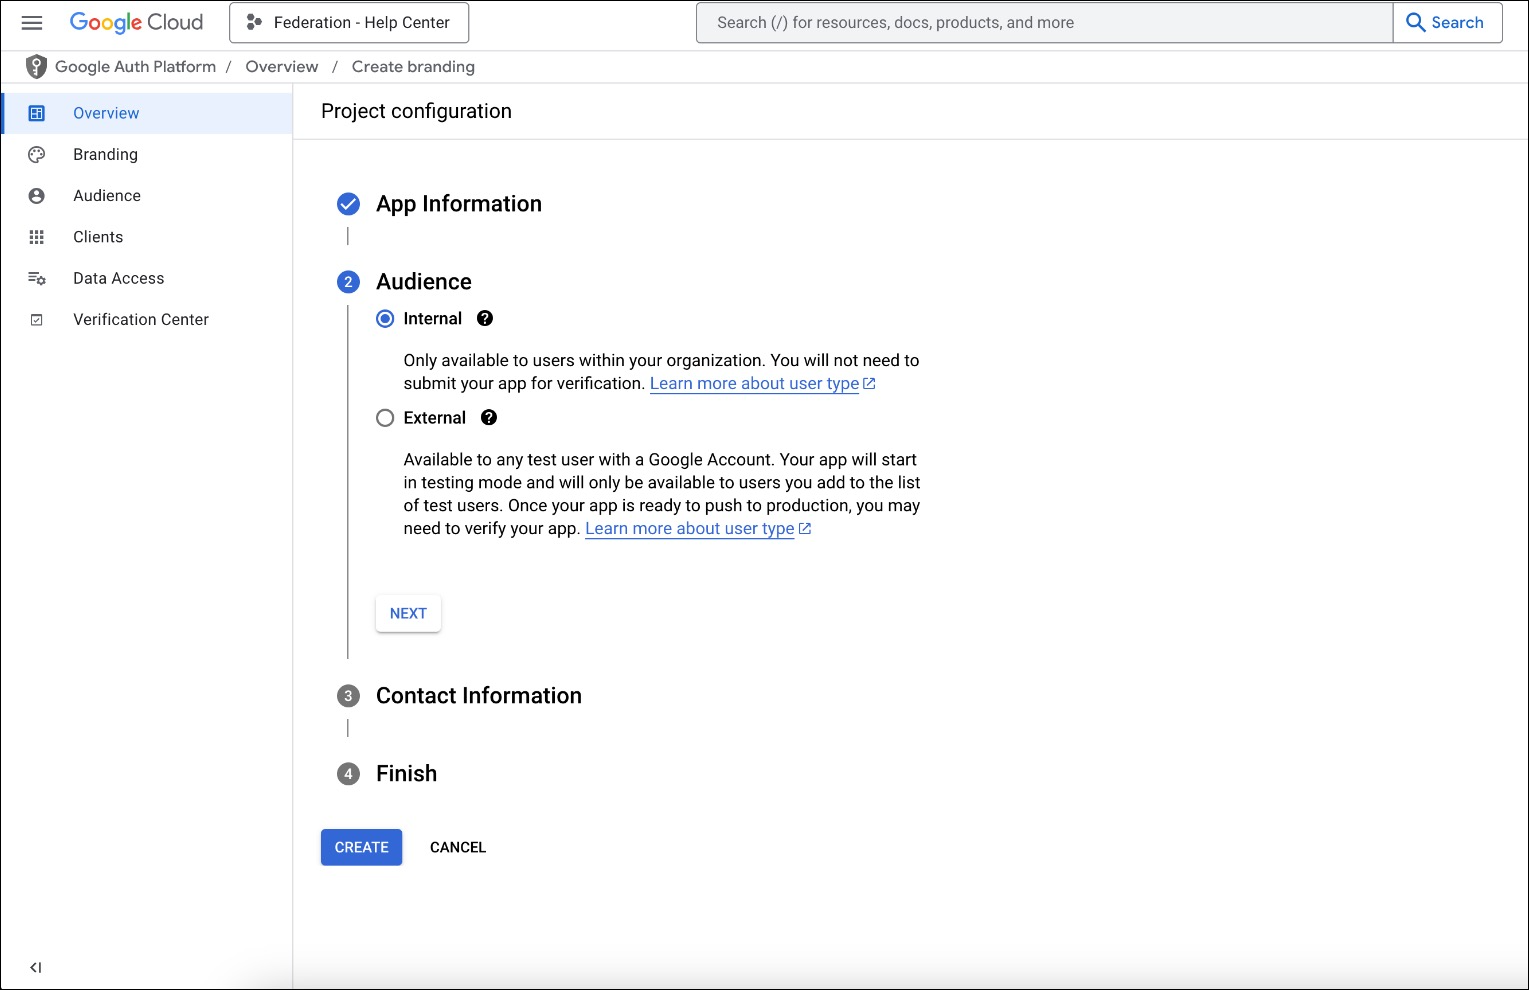
Select Internal
Select Internal and click Next.
Enter Contact Information
Under Contact Information, enter a contact email address, then click Next.
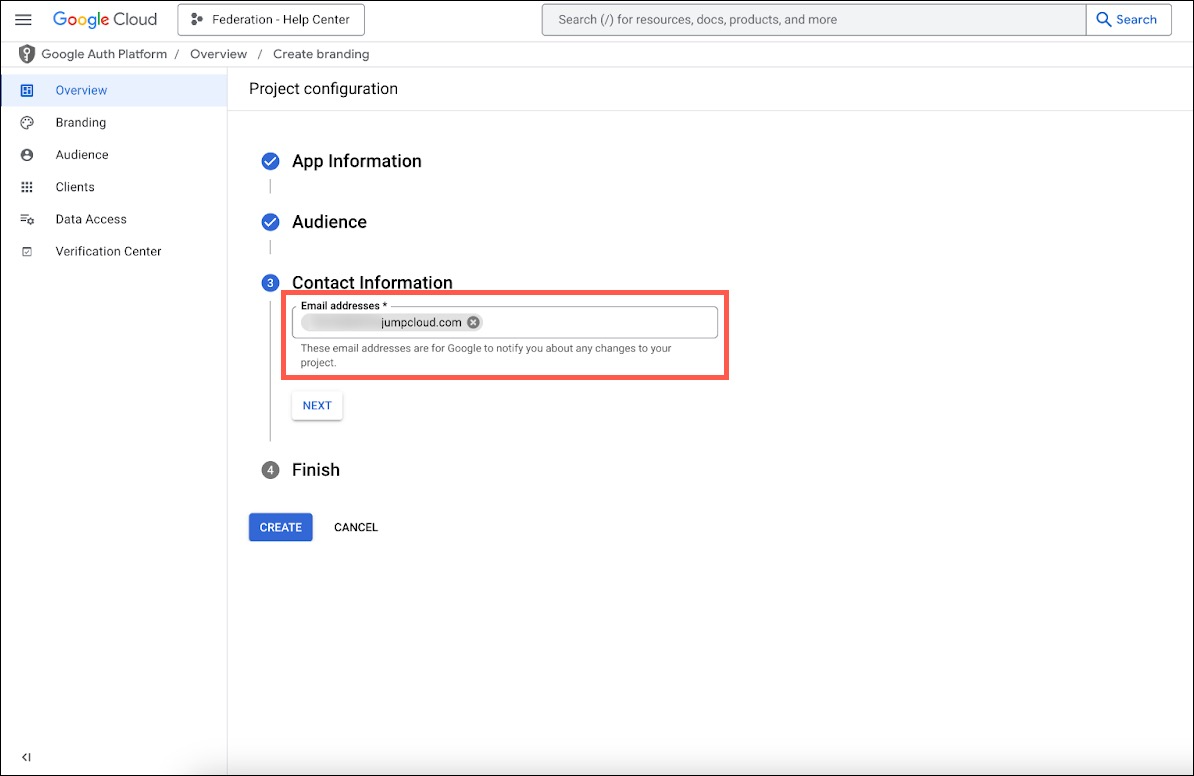
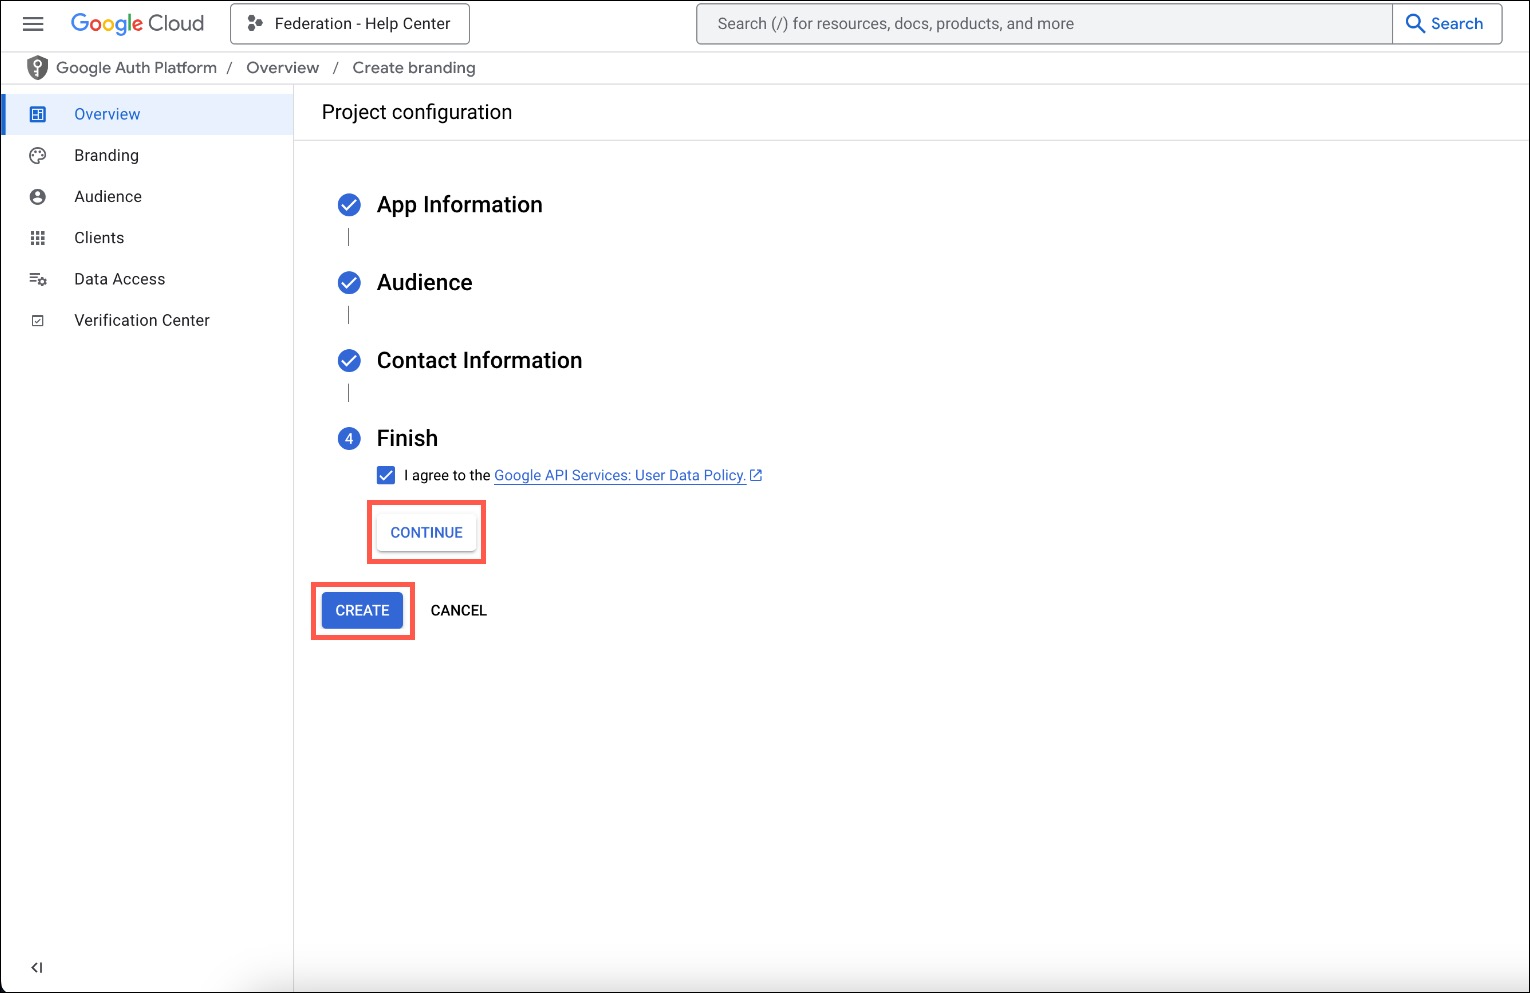
Agree and Create
Under Finish, select to agree to the policy and click Continue, then Create.
Configure Branding
Go to Branding
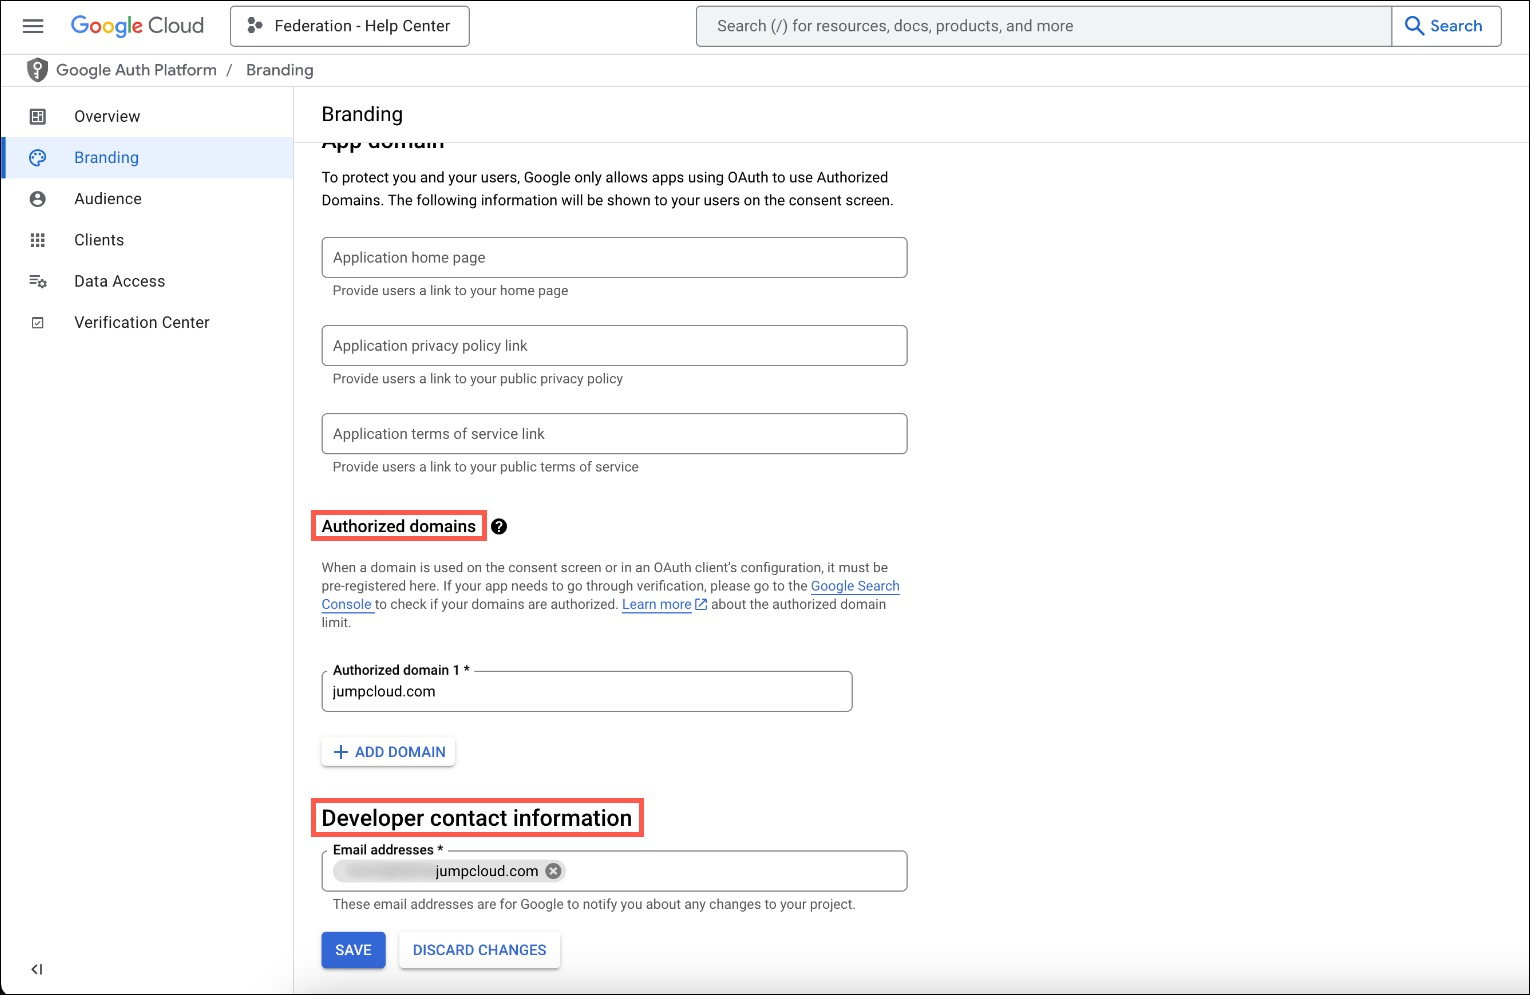
In the left menu, go to Branding.
Enter Authorized Domain
Scroll down to Authorized domains. Under Authorized domain 1*, enter jumpcloud.com.
Enter Developer Contact Information
Under Developer contact information, enter an Email address*.
Save Changes
Click SAVE.
Configure Data Access
Go to Data Access
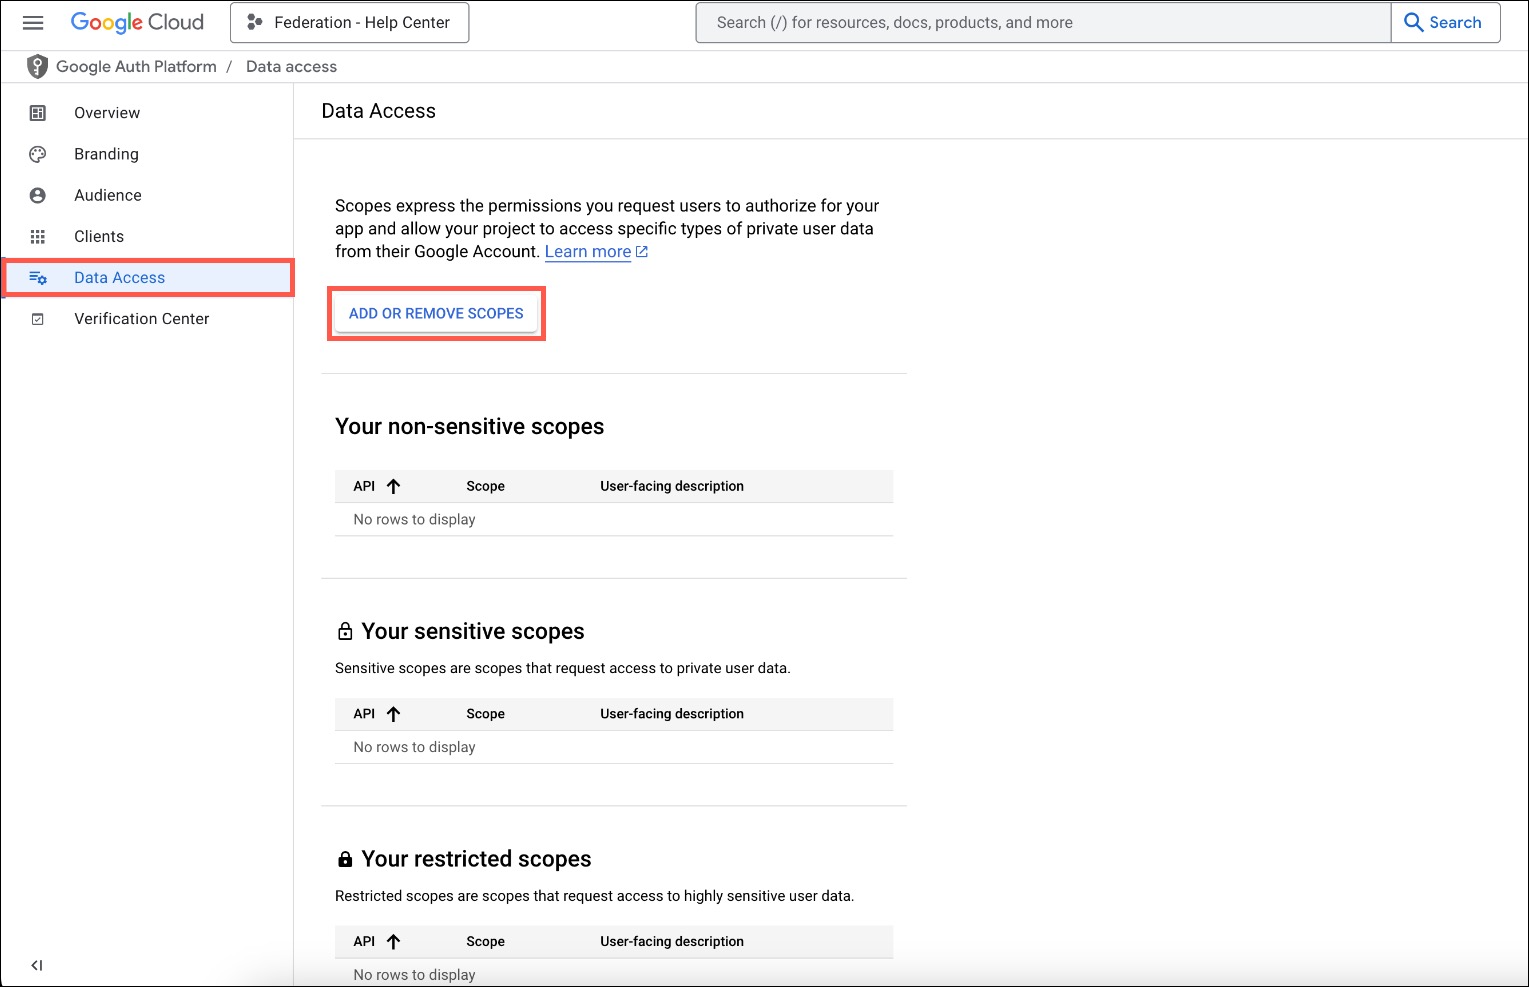
In the left menu, go to Data Access to manage the scopes.
Add or Remove Scopes
Click ADD OR REMOVE SCOPES.
Select Scopes
Select the first three scopes: email, openID, and profile.
Update and Save
Click UPDATE then SAVE.
Create OAuth Client Credentials
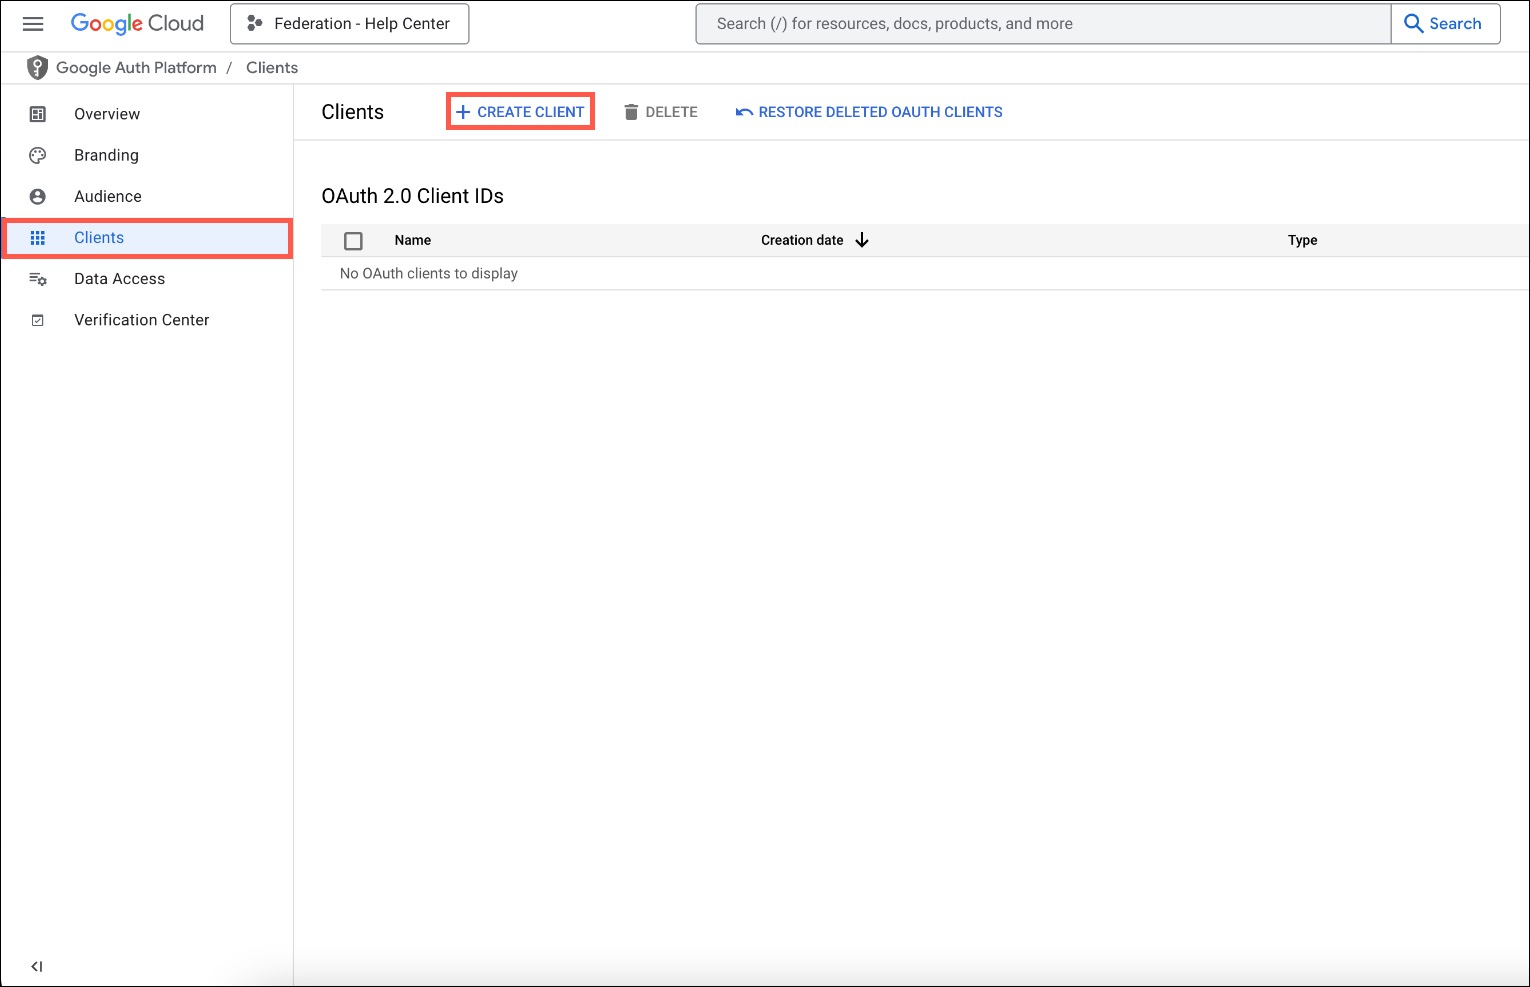
Go to Clients
In the left menu, go to Clients.
Create a New Client
In the top menu, click + CREATE CLIENT.
Select Application Type
On the next page, click the Application type* dropdown menu and select Web application.
Enter Client Name
Enter a Name*, such as JumpCloud OIDC, to associate it with JumpCloud.
Add Authorized Redirect URI
Under Authorized redirect URIs, enter https://login.jumpcloud.com/oauth/callback.
Create the Client
Click CREATE.

Copy Client Credentials
You’ll get a successful OAuth client created modal with the Client ID, Client secret, Creation date, and Status. Copy the Client ID and Client secret to your clipboard. You’ll need these to configure Google Cloud in JumpCloud. Then click OK to exit out of the modal.
Add Google as an IdP inside JumpCloud
Log in to JumpCloud Admin Portal
Log in to the JumpCloud Admin Portal.
Navigate to Identity Providers
Navigate to Directory Integrations → Identity Providers.
Add Google as an Identity Provider
Click Add Identity Provider → Google.
Fill in Identity Provider Details
Fill in the fields:
- Identity Provider Name:
Google OIDC(or any label you prefer) - Google IdP URL:
https://accounts.google.com - Client ID and Client Secret: Paste the values you copied from Google Cloud.
Save Changes
Click Save to save your changes.
Apply (or skip) a routing policy
JumpCloud lets you target federated login at specific groups. If you need that granularity, go to Directory Integrations → Routing Policies and attach your new IdP to a user group. If you skip this step, users will continue to authenticate with the native JumpCloud login until you apply the policy.
Managing the IdP
- Edit — Update the display name, IdP URL, client ID, or client secret at any time from the IdP’s detail page.
- Disable/Delete — Scroll to Delete Identity Provider at the bottom of the page. JumpCloud reverts impacted users to native authentication after deletion.
Troubleshooting tips
| Symptom | Quick check |
|---|---|
| Users loop back to Google login | Confirm the redirect URI matches exactly in both Google and JumpCloud |
| Error “invalid client” | Regenerate and re-paste the Client Secret |
| Users still see JumpCloud login | Verify that a routing policy includes their user group |