Editing a Group
Configure how users are added to a group using dynamic rules, nested groups, and individual assignments.
Overview
Editing a group is where you define who belongs to it, and by extension, who gets access to the apps assigned to that group. ShiftControl provides three rule types that you can use individually or combine to build exactly the membership you need:
- Dynamic rules automatically add and remove users based on their profile attributes. When a user's attribute matches the rule, they are added. When it stops matching, they are removed.
- Nested rules include all members of another group. If you nest the "Engineering" group inside an "All Technical Staff" group, every engineer is automatically a member of both.
- Individual assignments let you manually add specific users. Use this for exceptions or when dynamic rules do not cover a particular case.
Any combination of these three rule types can be active on a single group. Users who match any of the rules are included in the group.
How It Works
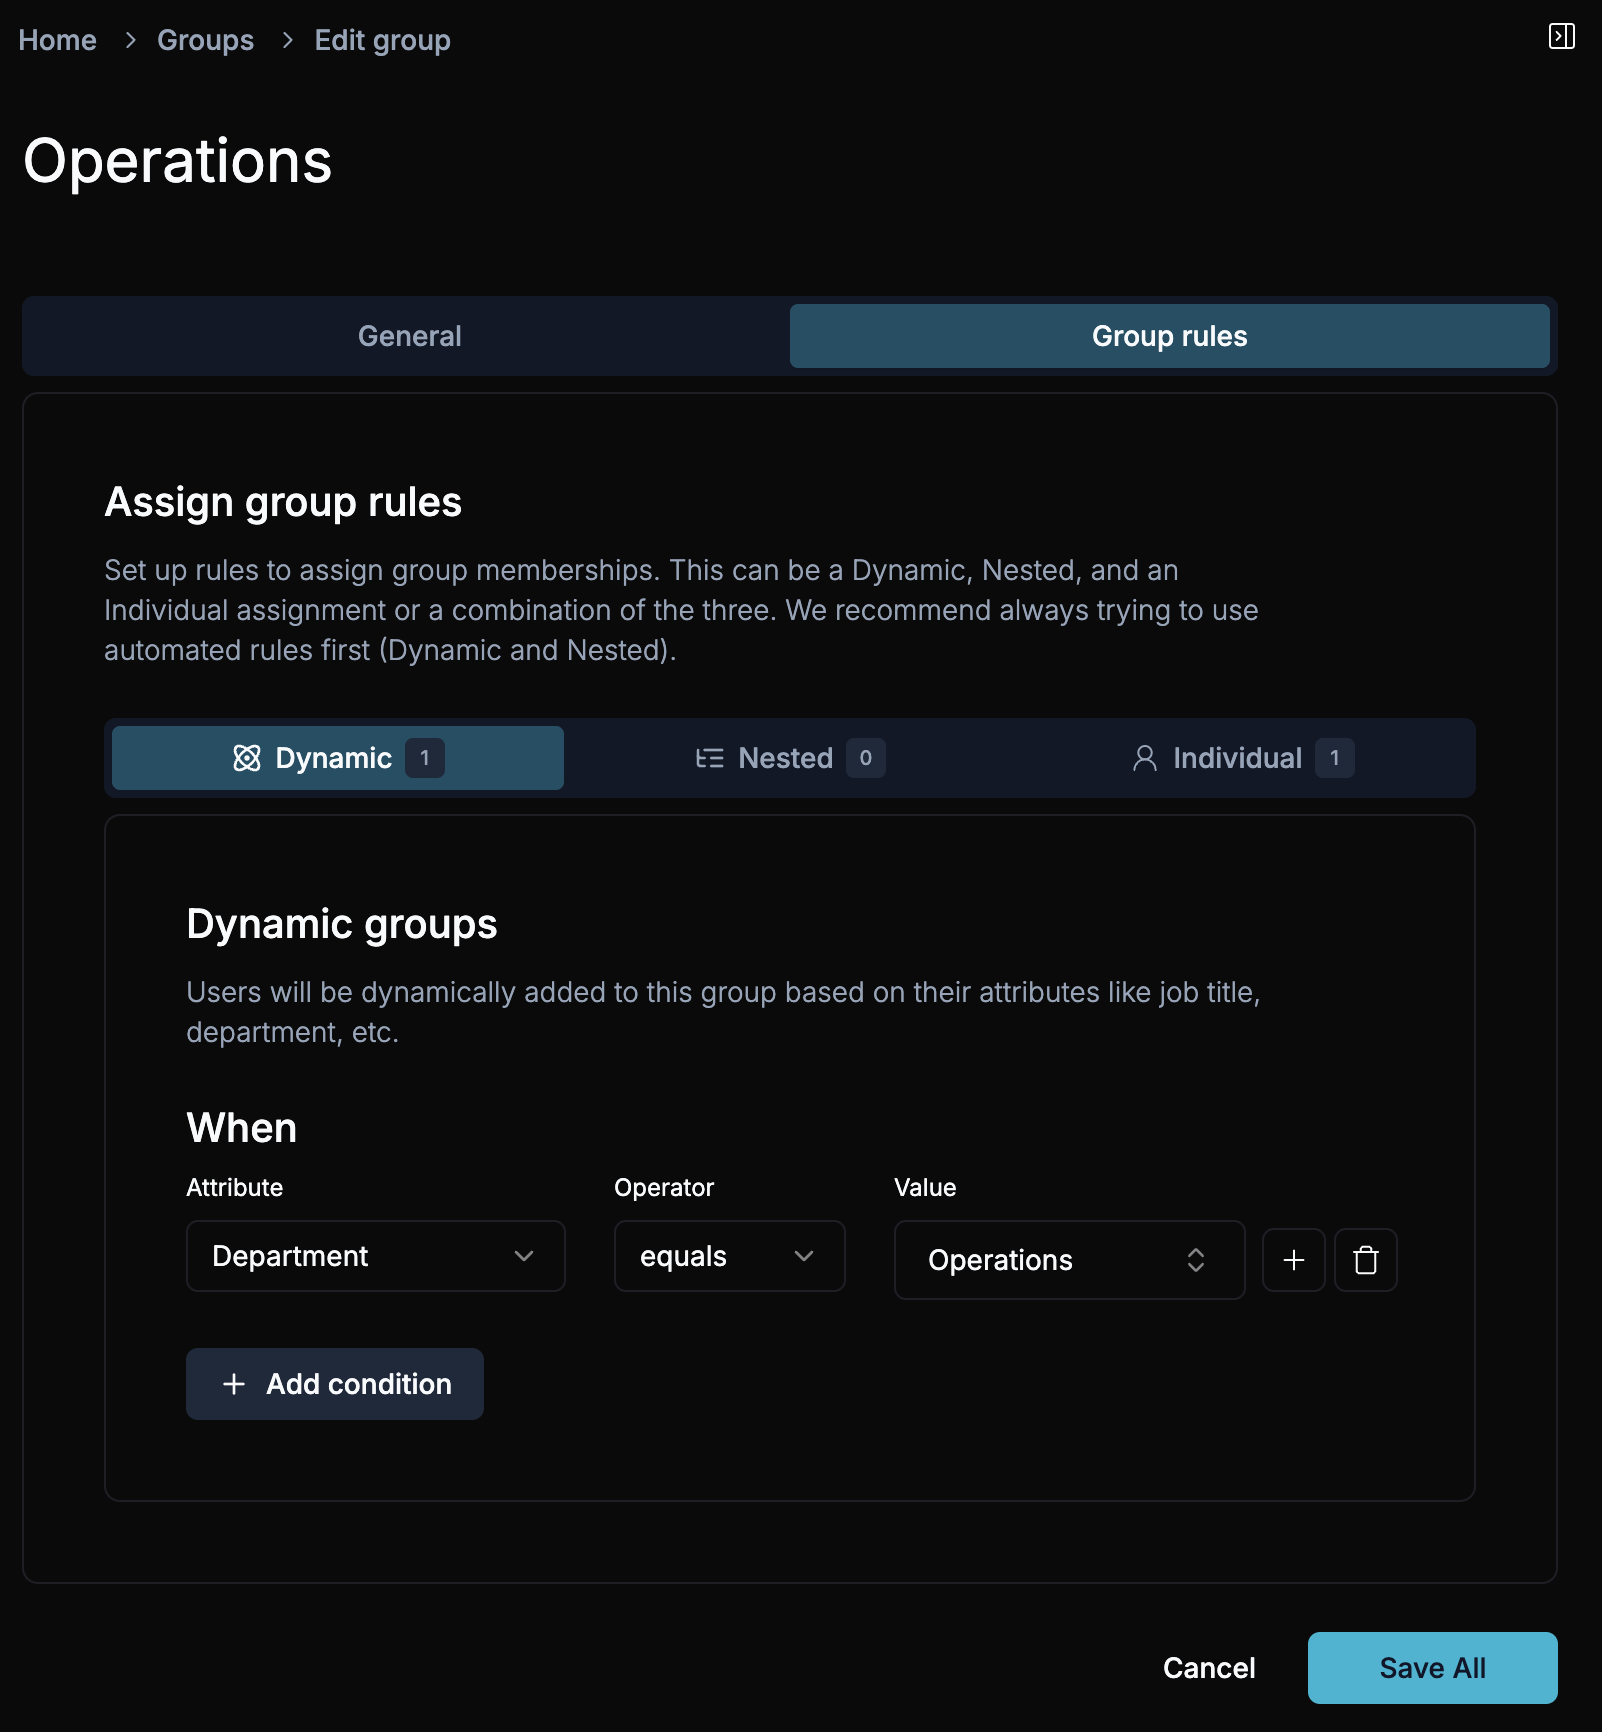
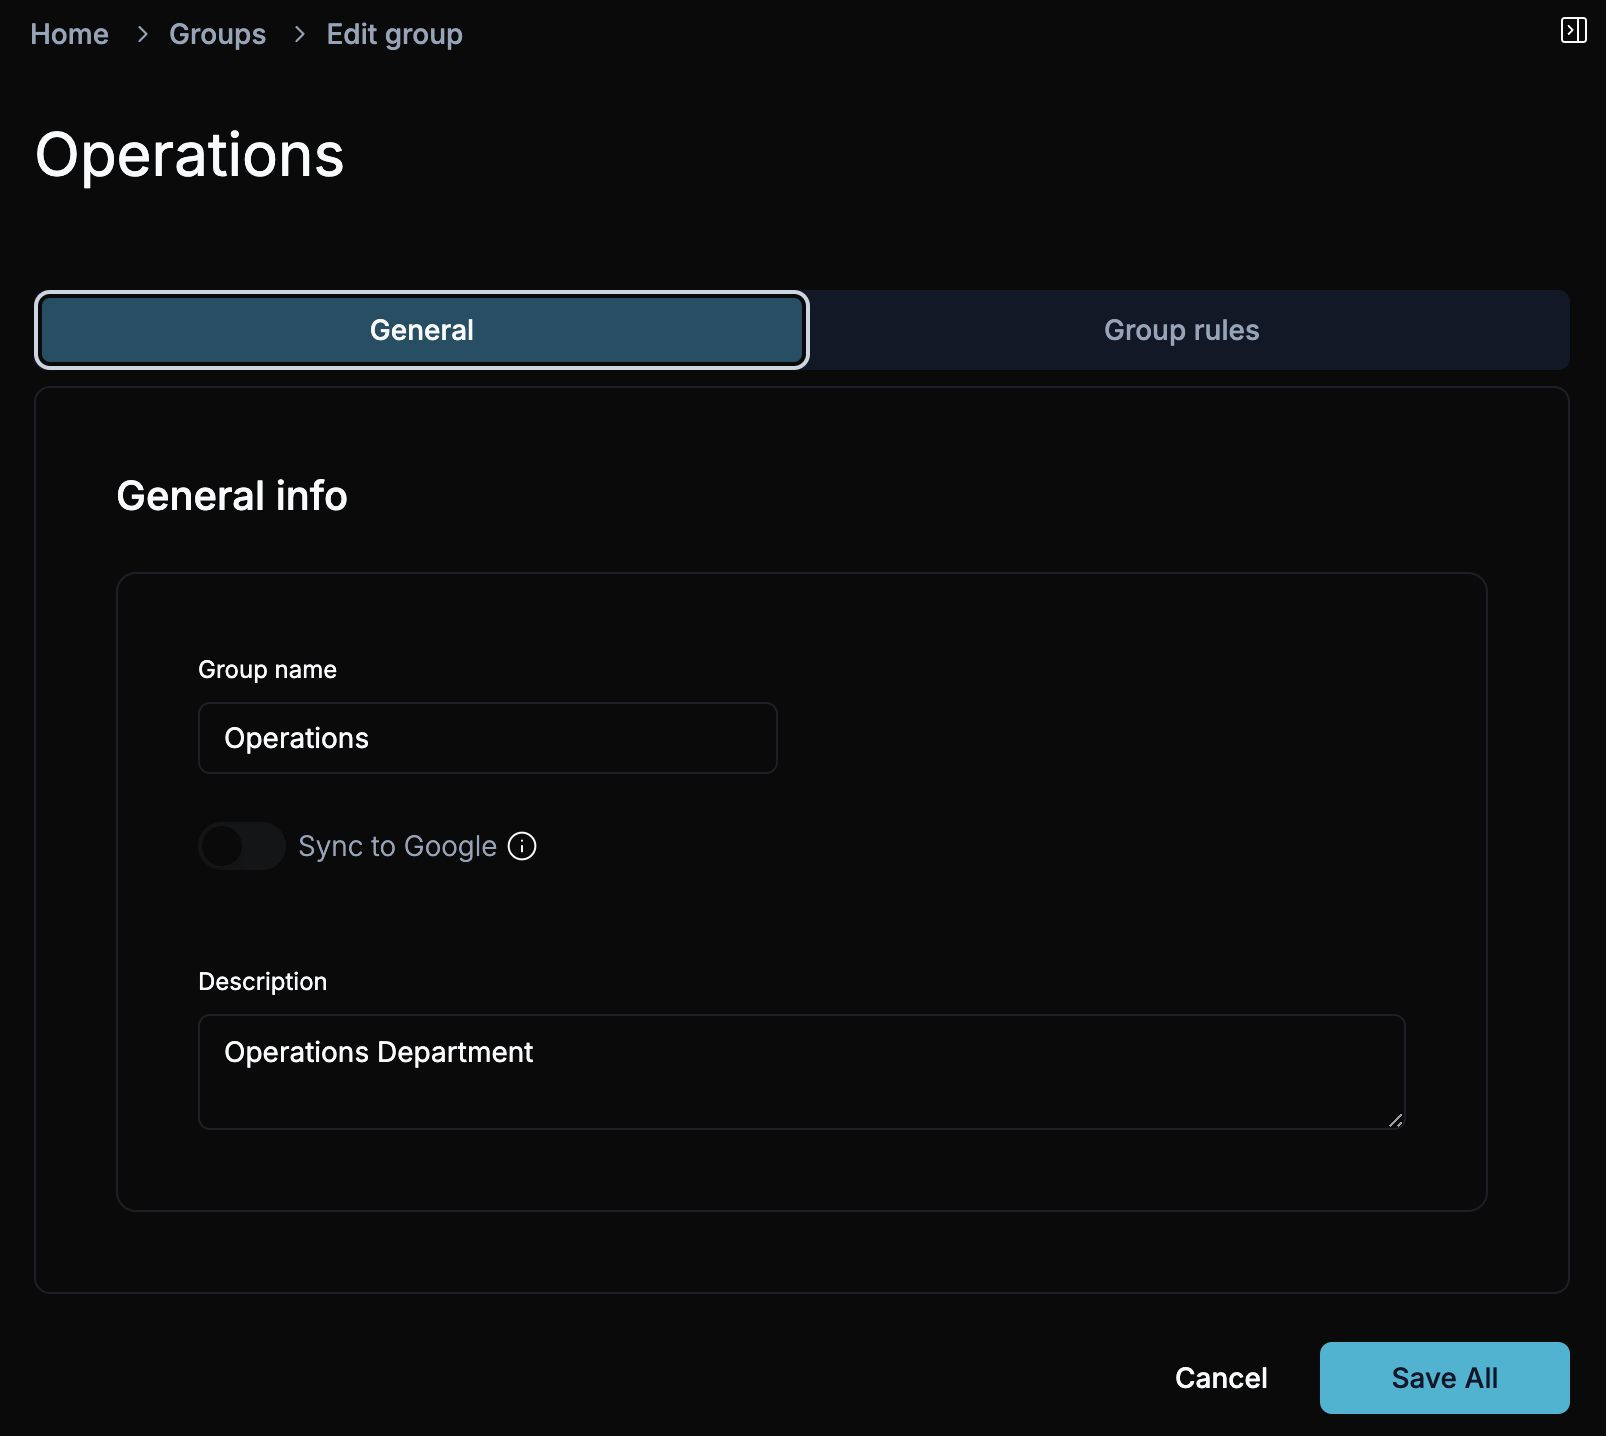
When you edit a group, you see two tabs: General and Group Rules.
The General tab holds the group's name, description, tag, and Google Sync settings. The Group Rules tab is where you configure membership. A right sidebar shows live group information including the current count of users, apps, and rules.
When you change a group's rules and save, ShiftControl immediately recalculates membership. Users who now match the rules are added and gain app access. Users who no longer match are removed and lose app access. This happens in real time.
Group Detail View
General Settings
Common Scenarios
Automatically assign all users in a department -- Edit the group, go to Group Rules, and add a dynamic rule: "When Department equals Accounting." Every user whose Department attribute is set to "Accounting" is automatically added. When someone transfers out of Accounting, they are automatically removed.
Build a group that combines multiple teams -- Create a "Product Organization" group and nest the "Engineering," "Design," and "Product Management" groups inside it. Everyone in those three teams is automatically a member of the Product Organization group and gets access to any apps assigned to it.
Grant temporary access to a contractor -- A contractor needs access to a specific tool for a project. Add them as an individual assignment to the relevant group. When the project ends, remove their individual assignment to revoke access.
Step-by-Step
Open the Group
Navigate to Groups in the sidebar, find the group you want to edit, and click on it to open the group detail page.
Edit General Details
On the General tab, you can update the group name, description, tag, and Google Sync settings. Click Save Changes after making updates.
Configure Dynamic Rules
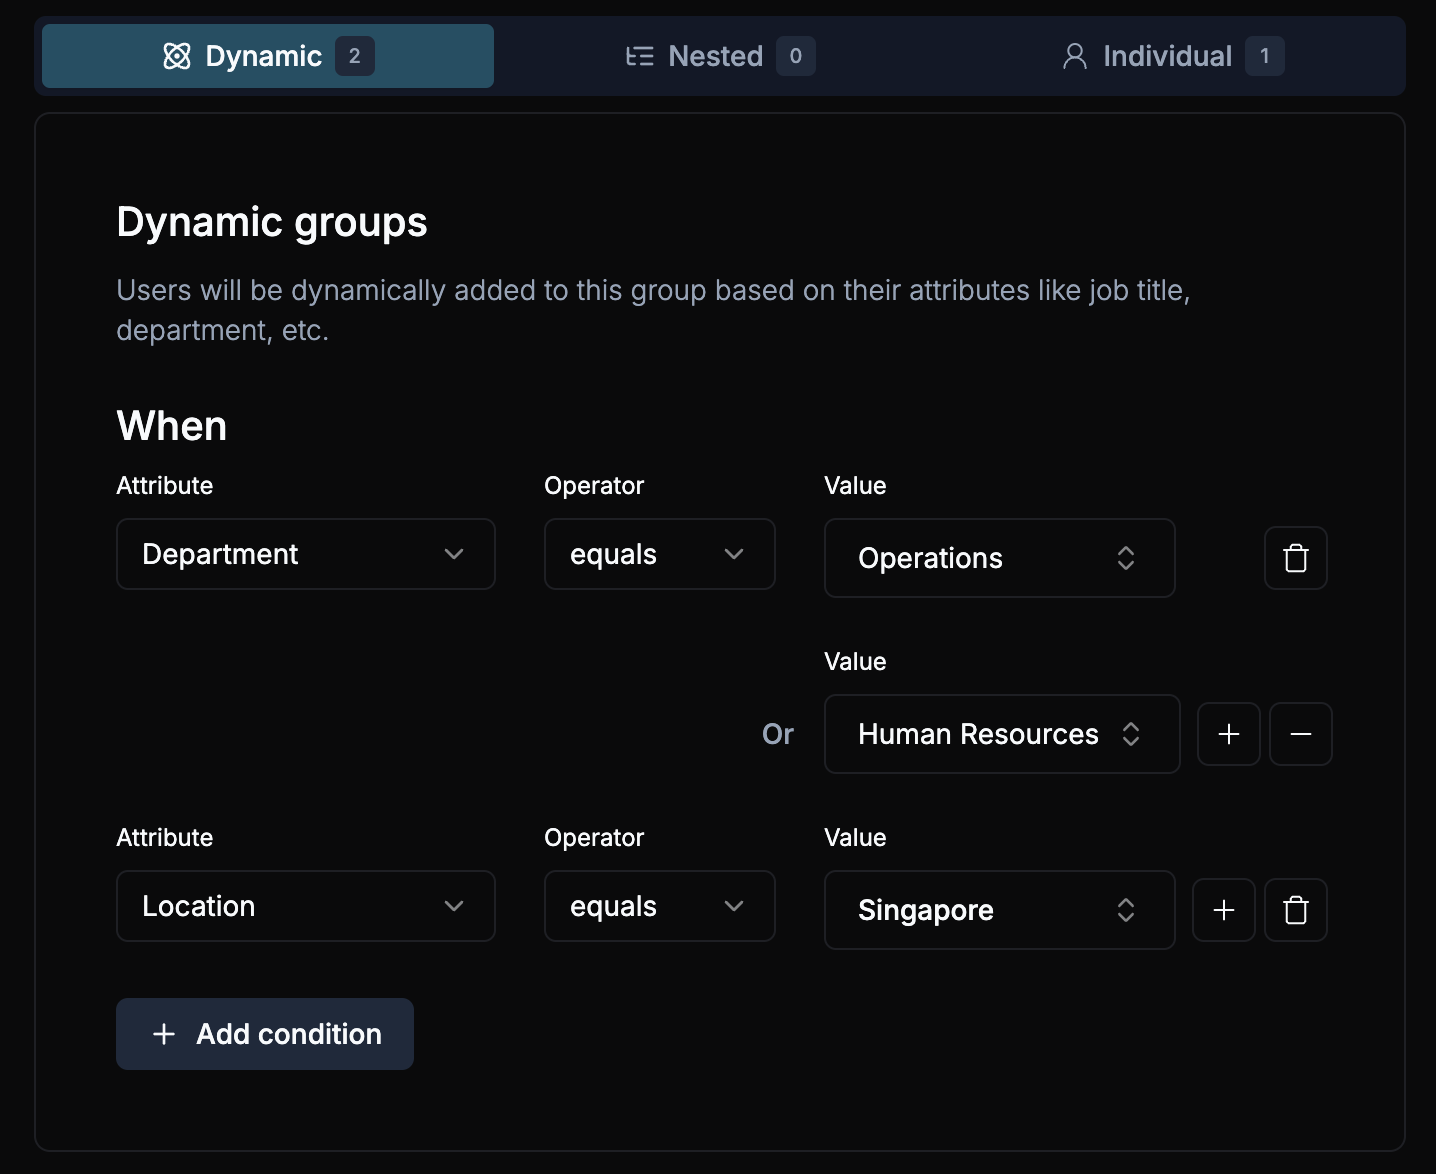
Switch to the Group Rules tab. Under the Dynamic section, click Add condition to create a new rule.
Each dynamic rule follows the pattern: When [attribute] equals [value].
Available attributes include:
- Cost Center
- Department
- Description
- Primary Email
- Employee Type
- Job Title
- Location
- Manager
- User State
- Team
You can add multiple conditions to a single rule. For example: "When Department equals Engineering AND Location equals San Francisco" to target only engineers in a specific office.
Configure Nested Rules
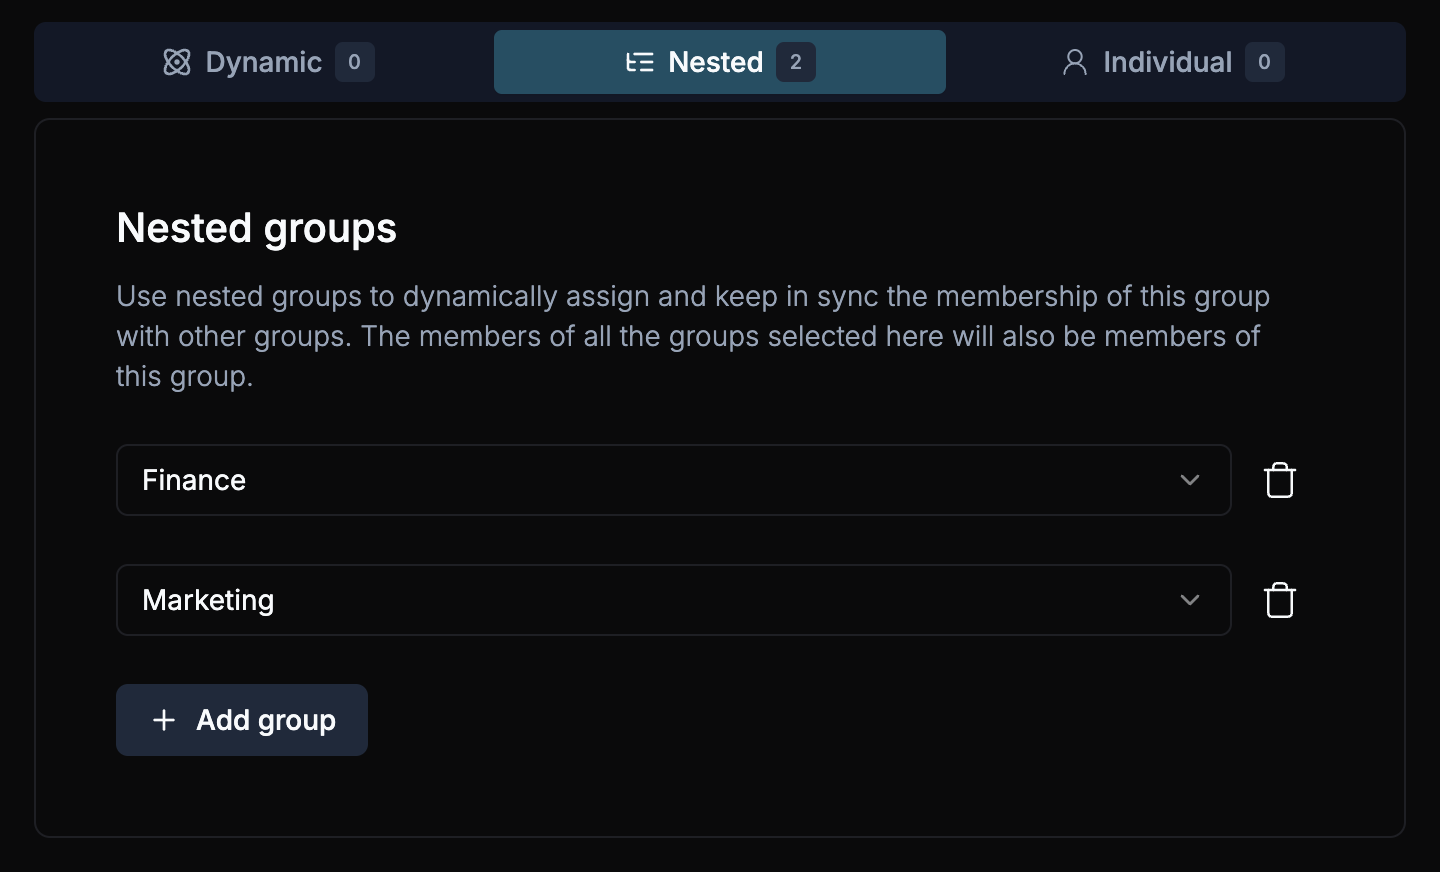
Under the Nested section, select other groups to include as members of this group.
When you nest Group B inside Group A, every member of Group B becomes a member of Group A automatically. If someone is added to or removed from Group B, their membership in Group A updates as well.
Only one level of nesting is supported. If Group A nests Group B, then Group B cannot nest another group. ShiftControl will show a warning if you attempt to create a deeper nesting chain.

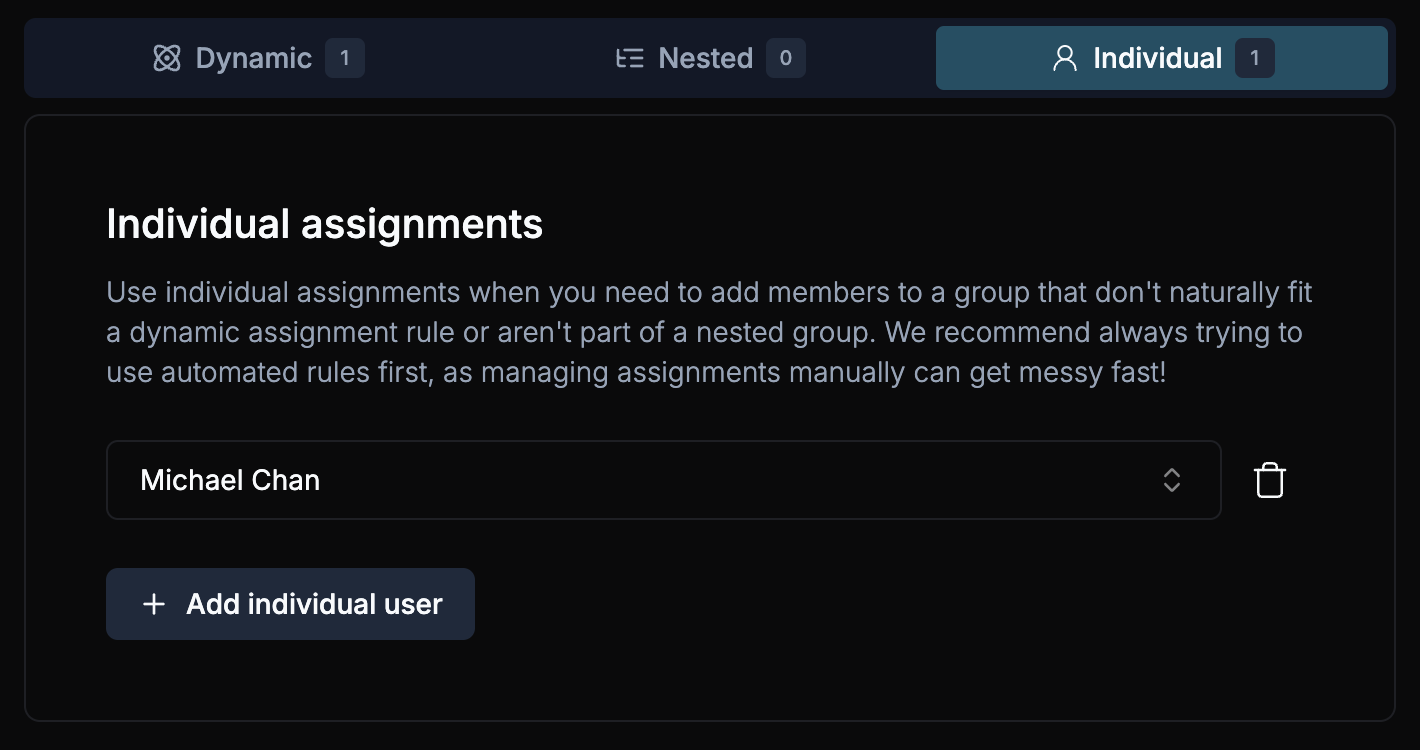
Configure Individual Assignments
Under the Individual section, search for users by name and add them to the group manually.
Individual assignments are useful for one-off exceptions, temporary access, or cases where no attribute-based rule would cleanly identify the right users.
Save Changes
Click Save Changes to apply the updated rules. ShiftControl immediately recalculates group membership and updates app access for all affected users.
Group Info Sidebar
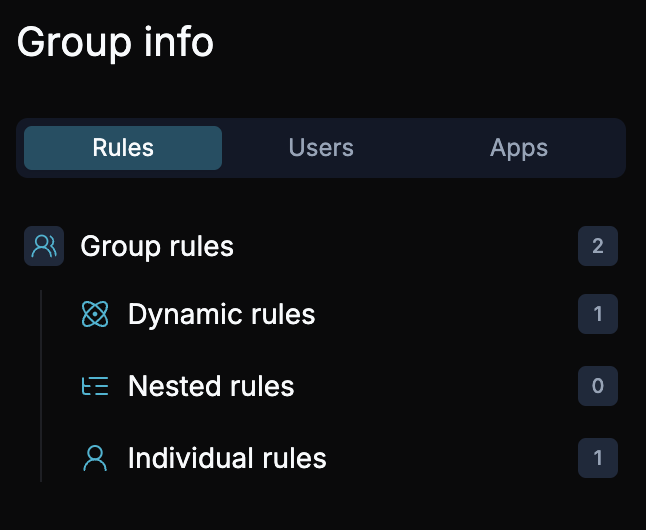
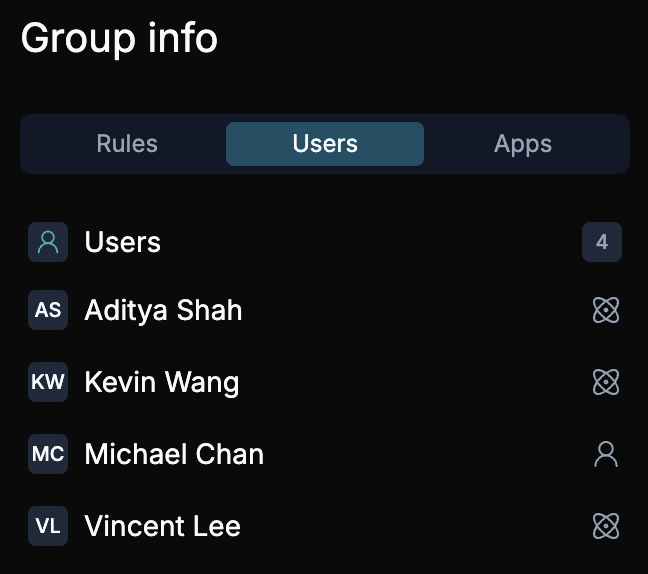
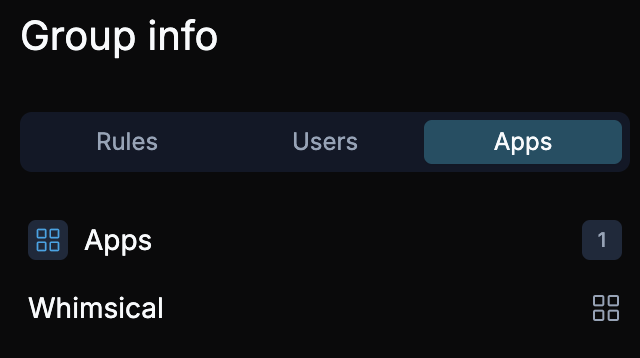
The right sidebar on the group detail page shows live information about the group across three tabs:
- Users: Lists all current members and shows how each was added (dynamic, nested, or individual). Hover over the icons to see assignment details.
- Apps: Shows which applications are assigned to this group. Adding or removing an app here changes access for every group member.
- Rules: Summarizes the active rules with counts for each type (Dynamic, Nested, Individual).
Sidebar -- Rules
Sidebar -- Users
Sidebar -- Apps
Things to Know
- Rule changes take effect immediately. When you save updated rules, group membership and app access are recalculated right away. There is no delay or approval step.
- Dynamic rules are the most powerful option. They keep groups accurate as your organization changes. When someone joins a department, changes locations, or gets a new title, dynamic rules automatically adjust their group membership.
- Nesting is limited to one level. You cannot nest a group that already contains nested groups. This prevents circular dependencies and keeps group logic easy to understand.
- Individual assignments override nothing. A user can be in a group through a dynamic rule, a nested group, and an individual assignment simultaneously. Removing one path does not remove the user if another path still applies.
- Removing a user from a group may revoke app access. Before removing someone, check which apps are assigned to the group in the sidebar. The user will lose access to those apps unless they belong to another group that also has those apps assigned.
- The sidebar is your audit tool. Use it to verify who is in a group, why they are there, and what apps they can access through this group.
Related Features
- Group Management -- View and organize all groups from the central list.
- Adding a Group -- Create a new group before configuring its rules.
- Syncing Groups with Google -- Push group membership to Google Workspace.